Many users face issues in internet connectivity when they are away from the wi-fi network. Netgear extender setup is the best solution for this issue. It plays a major role in expanding the Wi-Fi range to the hard-to-reach areas. So, below are the two procedure manuals and WPS methods to install the Netgear WiFi Extender Setup. So, without wasting your time let’s begin:
Find the WPS button on your router and press it till it turns orange.
Now, grab a laptop or a desktop.
Open any web browser in it.
Open Mywifiext.net or Mywifiext.local.
Now, create a login account.
Repeat the same process to set up dual-band wi-fi range extenders.
In the wi-fi Mywifiext login manual, the default username and passcode are included.
Hence, your Mywifiext setup is complete. In case you still face issues with the wi-fi extender contact us at our toll-free and reach out to our experts.
Enhance and expand your current home Wi-Fi network to hard-to-reach regions with the Wi-Fi range extender. You can get an increased Wi-Fi speed of up to 750 Mbps once you’re completed with the Netgear wifi extender setup.
You have reached the right post if you do not know how to set up the Mywifiext. Here, for the Netgear EX3110 Setup, you can learn various methods. Let’s go for the plunge
The login page of Linksys extender setup can also be accessed through manual configuration for Linksys Wi-Fi extender. There are some steps you need to follow if you want to access your Linksys range extender setupthrough a manual process which is given below-
Before anything else, to access the Linksys extender setupyou need to connect your extender with an updated laptop, desktop, smartphone, or a tablet computer.
Now you need to establish a connection between your device and Linksys extender through an Ethernet cable to proceed further in the setting up process.
Linksys Extender Setup can be accessed with the IP address 192.168.1.1.
Instead of this IP address, you can also login to the page with extender.linksys.com to open the setup page and go through the further procedure of new extender setup.
Now a page will open up asking you to enter your login credentials. Enter your credentials as asked.
After entering your login credentials, you will be prompted to the new extender setup page.
From the options available on this page, select the wireless option, and proceed further.
In the wireless menu, you’ll get a lot of other options. From there, select the ‘Basic Wireless Settings’ option.’
Now, you have to select the radio button which is corresponding to the ‘Manual’ setup process.
After this, space will come up in which you will have to enter the SSID name of your home network to proceed further in the setting up process.
Now you will get the space to enter various security methods and passwords for your Wi-Fi extender and save the settings to finally complete the WiFi extender setup process.
Linksys extender setup is a very easy and simple process, but if you are not so sure about your how-to knowledge regarding the process, then it can be a really frustrating experience for you. Wi-Fi extenders are of great use as they provide a wide and more reliable Wi-Fi range.
Not able To connect with Linksys RE7000 Setup Linksys RE7000 Setup can be done in a fraction of minutes only if you have any issues while installing Linksys RE7000 don’t worry just dial our toll-free and talk with our experts at +1-888-880-2791. Setting up Linksys RE7000 is time-consuming.
Linksys RE7000 Max-Stream™ AC1900+ Wi-Fi Range Extender can be installed with two methods, as a Wi-fi range extender or Access point respectively. This article will show you steps on how you can set up the Linksys RE7000 to Range Extender mode.
Linksys RE7000 Setup
Step 1: Plug your Linksys RE7000 into the socket.
NOTE: The power light will turn orange which can take up to 1 minute
Step 2: With the help of your computer or Mobile device, you will need to connect to with Linksys RE7000 Network.
Step 3: Open any browser on your device and visit extender.linksys.com or 192.168.1.1
Step 4: Once you are landed on the Linksys RE7000 Setup page, you will have to follow the on-screen instructions to complete the setup of your Linksys wifi extender.
Step 5: If you still cannot visit the Linksys RE7000 Setup page, Talk with our experts using the chat or toll-free +1-888-880-2791.
Alternatively, you can also set up the Linksys RE7000 to Access Point mode.
It is unfathomable to picture a way of life that lacks strong and proper Internet connectivity. Since Wi-Fi has emerged in the internet connectivity scenario, the scenery has been largely molded into Wi-Fi’s favor. This has led companies to launch a various range of products to meet the increasing demand and need for high-speed Internet connectivity in the world. Wi-Fi network seems to have solved all the problems of strong and high-speed connectivity but there are certain issues that a Wi-Fi router faces which is then counted as the drawback of the Wi-Fi networking. In observation and practise it has been found that the architectural design of houses and the thickness of walls weaken the Wi-Fi networks. This limiting of range of a Wi-Fi network is its biggest drawback. There is also a limit on the number of devices that can connect to a Wi-Fi network, which is a major drawback.
To counter the problems faced by a normal Wi-Fi router and provide solutions to persisting problems, Linksys Extender bears the role. Netgear genie as the name suggests widens the range of strong internet connectivity and boosts up the network. Thus, Netgear genie Setup calls for a delicate and precarious installment procedure that should be followed to avoid any error in installation and complete the process successfully. For this purpose, the marketplace allows you a variety of options to choose from – with varying range, varying strength, and the different number of devices that it allows to connect with. The user must choose the extender suiting their needs.
This blog is an informative blog on the installation of the Netgear genie setup and increasing the wi-fi connectivity and range.
Accessing the Netgear Genie Setup Page
Installation of Netgear genie involves some basic steps which need a Wi-fi enabled Laptop or PC or even mobile with an up-to-date browser to access the setup page.
The first step involves ensuring whether the extender is tightly connected with the power source. The Wi-fi router could have been in use either by an ethernet connection or wireless connection option.
The next step is to access the Log-in page by entering the default login address of the Netgear genie setup in the browser – which is – mywifiext.net. This is the standard and default configuration page for Netgear Extender Setup.
This page will open a Log-in page in the browser asking for your username and password. Enter the credentials and you are good to go. The extender would be connected to the Wi-Fi easily.
If you are trying to access the configuration page from a device that uses Windows 10, then you are required to follow a few easy steps to access Netgear genie Setup. The following steps would ease out and smoothen the installation –
Press the start button on the extender to make sure it is connected to the Power system and to the Wi-Fi network.
Select the ‘Network’ option available on the screen to initiate the process.
Right-click on ‘New extender setup’ available on the computer screen.
A page will open up asking for your Log-in credentials, and you need to enter your username and password to continue with the process.
The completion of the last step would make you ready for the Netgear genie Setup process.
The Netgear genie Setup process is a cakewalk and benefit to the user if done in the right way. To create a super-strong internet connectivity option at home and to the multiple devices, extenders are used widely and are available in the market with varying specifications and range. Linksys extender is the device that primarily helps you out when you have multiple internet users at home and the architectural designs or the number of floors is not helping the Wi-Fi router.
If any new issues come up or the problem of sluggish internet connection persists then there is always an option of resetting the extender. The Wi-fi extender is reset by using Web-based utility and by following these easy steps –
The first step involves using the default link mywifiext.net to access the configuration page in an updated browser on your device.
The log-in page will open up where you need to fill in credentials such as username and password.
Another page opens up with various options, from whom you need to select the ‘Administrative’ option and proceed.
The next page that opens up, select the ‘factory default’ option from there.
Now select the ‘management’ option from the list of various options available.
On the next page, select the ‘restore configuration’ option.
After following these easy steps, save the changes you have made and then your extender is reset to provide uninhibited ultra-fast internet experience.
This informative blog has aimed to answer all the doubts and queries regarding the setup of the Netgear genie to attain high-speed internet connectivity at home with multiple users or multiple floors or uneven architecture of the House. Set the Netegar Wi-Fi extender setup at your house suiting the best option from the market – precisely crafted to your needs, and achieve the salvation of good internet in this online and digitized world.
While setting up the extender to your Wi-fi network, ensure the proper connection of cables and an updated browser and system to access the installation properly. You should, in rare cases, have alternate browsers available if there arises any problem with your default one. Though this is not observed, it is advisable to have options on hand.
Are you looking to set up a Netgear extender at your home? If yes then your search ends here. This page will drive you through the steps that you must follow in order to set up your Netgear Extender at home. Let’s just begin.
Firstly, you have to arrange some perquisites before starting with the setup process. Let’s have a look at the requirements:
The first requirement is that the router and the Mywifiext extender are needed to be in the same room.
The second requirement is that a proper supply of power should be given to the extender.
The third prerequisite is that you need a working internet connection or a Wi-Fi network.
The last requirement that we need is two internet browsers installed on your computer.
With all these requirements, the Mywifiext extender setup will be a cakewalk for you. Let us now have a glance at the other steps that are required for the setup.
Mywifiext extender setup using www.mywifiext.net
There are mainly two methods to get our Netgear Wi-Fi extender installed. They are manual and WPS method. Let’s take a glance at both of them respectively:
Mywifiext extender setup: Manual method
This method of setup is also popular by the name of the “web browser setup” method. Do every step one-by-one as stated below:
Turn the extender on by providing it a proper supply of power.
Make sure that your Wi-Fi device and extended are connected with each other.
Turn on your Network manager and look out for NETGEAR_EXT. Once found, connect to it.
Open any of the installed browsers on your computer
Open the default page of your mywifiext extender setup page and if you encounter any problems while accessing, contact the customer service.
You need to make a new account if you have not created it before.
Now when you’ve done the above steps, now click on the SSID of the network that you need to get extended.
Hit the button that reads “Next” followed by the “Finish” button.
And that’s where the setup ends. This is the point when you may place the extender wherever you like, regardless of the place.
Mywifiext Extender Setup: WPS Method
It is one of the easiest variants of methods to set up the extender. It is also known as the Wi-Fi protected setup. Follow these set of instructions to do it:
The first step is to confirm that the extender is in “On” mode.
Locate a button namely “WPS button” and once it is found, press it for about 5 seconds.
Do the same for the old router as well I.e. locating and pressing the WPS button.
A green color in the LED indicator concludes that the connection has been established between an extender and the router.
If there is no sign of the LED light then you may consider help from an expert.
The same set of Instructables can be employed for dual-band range extenders as well.
Lastly, you need to connect the device to the network of the extender and to do that, you have to use the same password as your router.
You may check the manual you got for the default credentials of your router.
With this step, you have successfully completed the setup of your extender. You may enjoy fast internet services over a longer range in your house now.
In case, there are some problems with the mywifiext extender setup, contact the customer service as soon as possible.
Mywifiext extender setup: Without Ethernet Cable
Every extender has a different build and that’s the reason that not every extender has an Ethernet port. And just because of this one reason, people encounter various problems while setting up their extender.
Here is a step-by-step guide that will walk you through the necessary things that you must follow to set up your extender without the need of an Ethernet port:
First and foremost, get your extender to reset to the default settings that it came with.
Secondly, you need to connect your extender to a stable Wi-Fi.
Thirdly, log into your account using a web browser that is installed in your system.
Once these three steps are done, you will require to enter the username of the extender and the default password.
To get any assistance regarding the login, contact the customer service.
Later on, you need to follow the necessary steps that are shown in the Netgear installation wizard to get it connected with the router.
And at last, simply connect your devices to the extender.
If there are still some problems that persist in the setup of your extender, contact the highly professional.
What is NETGEAR_EXT ?
If you are wondering what is NETGEAR_EXT, then you must know that it is an extension that is mandatory to get access to the Netgear Wi-Fi extender. The moment you have completed the setup procedure using the mywifiext.net website, your devices such as laptop, mobile, and PC can access the Wi-Fi connection through this extension only.
To do this, just turn on the power supply for the extender and look for the network SSID named “NETGEAR_EXT” and connect to it. Just so you know, it is the default SSID of the network.
Common problems that may encounter while setting up the extender
Not being able to log in to the settings portal of the setup
Forgotten the admin password of the extender
Experts for the assistance of your new Netgear extender are here to aid you
Netgear is a renowned brand of extenders. They have a specialized team of experts that are always up to help you regarding all your concerns about the Mywifiext Extender setup.
If you ever face any issue while setting up your extender, you just need to make a call to their toll-free number and they will provide you the assistance you need.
Customer satisfaction is the primary motive of Netgear and that’s what makes it better than the others. Therefore, in the upcoming future, if you ever need any network-related gadget, try Netgear and the results won’t be regrettable.
If Your Netgear Wi-Fi Router is unable to connect, Follow the steps mentioned-below
Pick an ethernet connection and connect to your router with the modem.
Ensure that the connections to the cable are finger-tight.
Connect a WiFi network to your devices.
Now, the whole network is power cycling, i.e. the modem, router, and your computer.
Power cycling ensures that all the machines are turned off and then turned on after a few minutes.
Open any of the web browsers on your computer which have been installed.
Any browser, such as Google Chrome, Mozilla Firefox, Microsoft Edge, Internet Explorer, or Apple Safari,can be used.
In the address bar, enter routerlogin.net and press enter key.
In the required fields, enter the username and password.
Contact our experts on +1-888-880-2791 the off chance of failing too, and complete the router login.
If you want to use a mobile device to configure your WiFi router, download the Netgear Genie setup app and follow the same procedure.
Still can’t install Netgear Wi-Fi Router ? Please dont panic! Only contact us, with the support of our professional technicians, finish your Netgear Router Setup. You want to install a new extender setup? our technical support team will provide you technical support regarding the installation of Netgear extender setup or Mywifiext.
How To Login Into Netgear Wi-Fi Router: Setup Page
Plug-in your Router Setup Into an power socket.
Reset it to the default Settings.
Plug an ethernet Cable to connect to moderm.
Cables should be damage-free.
It will blink Solid green light.
Open web browser and enter routerlogin.net.
Enter the default login credentials.
Hit, the Routerlogin Setup Finish Button.
If the above Mentioned article does't help you to login into Routerlogin.net then not to worry we got your back covered. You can call our Netgear Wi-Fi range Expert Technicans Anytime 24*7 on our Toll-Free: +1-888-880-2791.
If you are new to the world of Netgear wifi range extenders, the local Web address Mywifiext is the first and foremost thing you should remember. This is a local web page offered to its users by Netgear for their ease, so it is not like other web pages. In order to establish your Mywifiext net setup and enjoy the many advantages it offers, you can use this web address.
There are several ways to configure your Mywifiext net setup for Netgear. The manual method and another is the WPS method. Next, let ‘s look at the manual setup steps:
Firstly turn on your Netgear extender.
Connect your extender and install a connection b/w Netgear extender and your computer.
On your wifi enabled device, launch a web browser of your choice.
In the url bar of the browser, type the mywifiext.net ( Netgear Extender Setup) in the web address
You would be redirected to the Mywifiext net setup wizard.
Choose the mode that you want your Netgear extender to be configured on the Extender or Access Point Mode.
Select the Home Network.
Enter or create appropriate default credentials
Your extender is good for use now.
Netgear Extender Setup using the WPS method
Your extender needs to be switched on.
On your Netgear extender, search for the WPS button
Click and hold your extender’s WPS button for a while.
On your extender, the WPS LED light will start blinking
Now, within 2 minutes of pressing it on the extender, click the WPS button on your router.
Your Mywifiext setup will be installed automatically via WPS.
A wi-fi mesh extender, the Netgear Nighthawk X4. Both areas of your room are secured by the Nighthawk mesh wifi extender. With the Netgear extender setup, you can easily connect all your devices. For all connected devices, you can use one name and the same password. It comes with a smart roaming feature that connects your devices to the best wifi network automatically. These steps can be used for setting up your extender;
Your Netgear extender setup needs to be turned on first.
You can now place your extender near the router.
Your Netgear Nighthawk X4 extender can be wired to the power supply.
Now the green color of the LED lights will start blinking.
Then you need to keep the power button if the LED light does not blink.
Using your Nighthawk router, attach your Netgear Nighthawk extender.
You can now open a web browser for Chrome. Specify the details.
The user can open the page of their Netgear genie app and tap on ‘Do More’ and then on the Fastlane choice tab.
The first two options here are 2.4Ghz for ‘Device to Extender’ and 5Ghz for Extender to the Router, and the second option is 5Ghz for ‘Device to Extender and 2.4 for Extender to the Router.
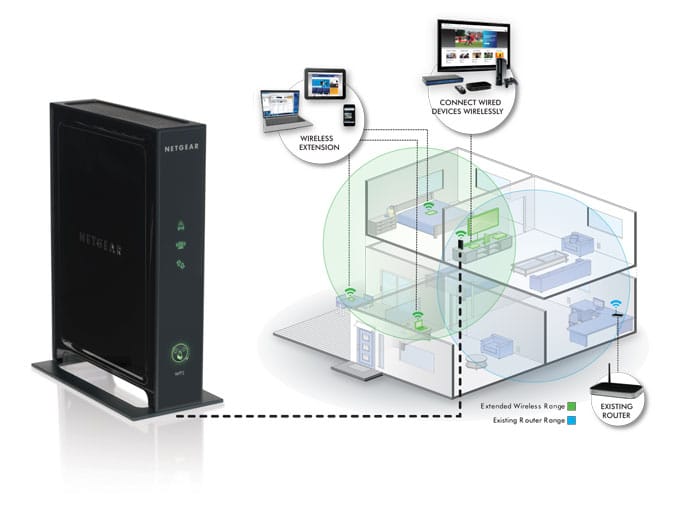
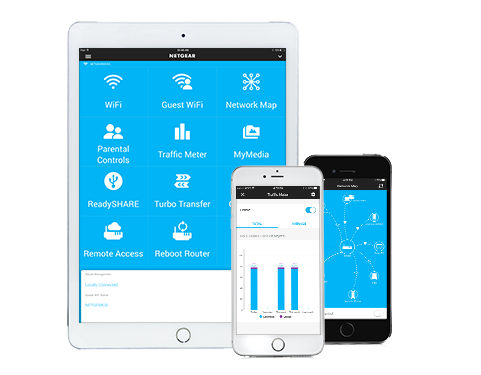
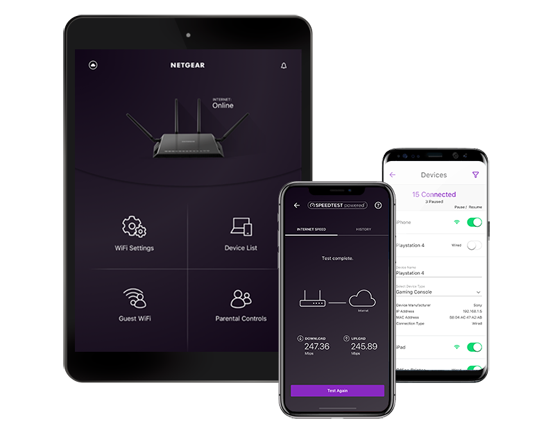
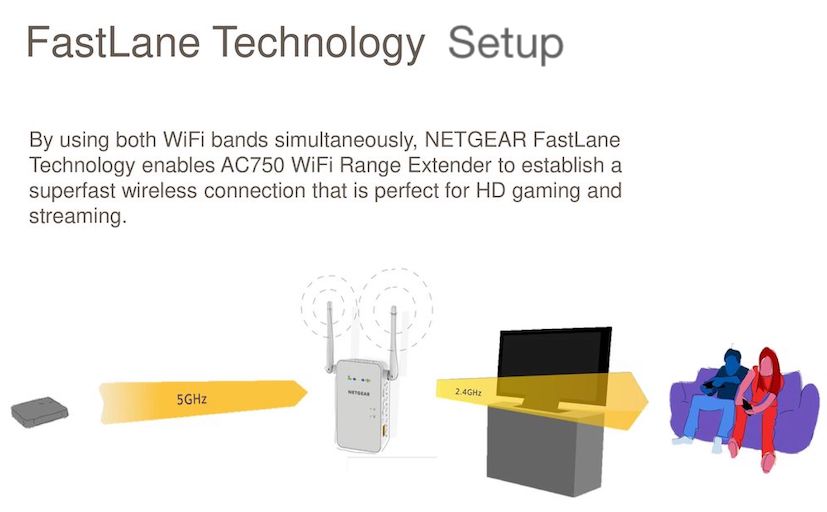
The Netgear WN3500RP Setup of N600 WiFi Range Extender not only improves your dual-band WiFi, but it also lets you stream songs to a wired speaker using Airplay or DLNA. You can also plug your printer into the USB port and print wirelessly from your iPhone or iPad using AirPrint. You can also connect 1 wired computer to your wireless network, including smart TVs, game consoles. Here, you can read the setup steps for the Netgear WN3500RP Extender Setup. Continue to read.
Netgear WN3500RP N600 Extender Setup
Method manual
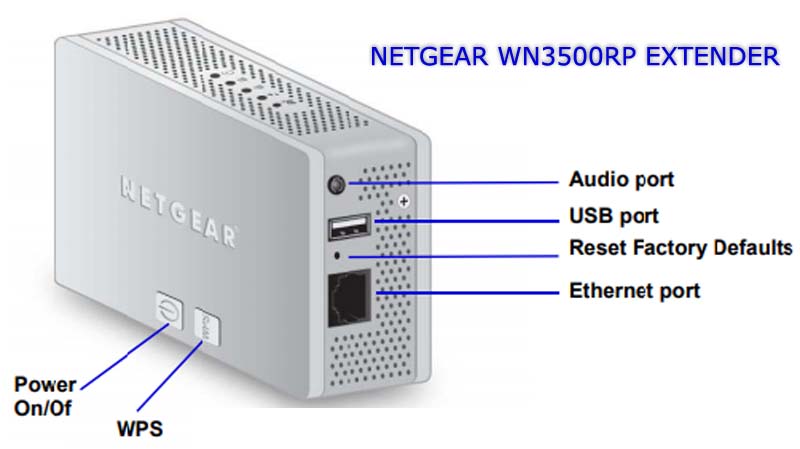
Netgear WN3500RP Extender N600 Power on and wait for the power LED status to turn green.
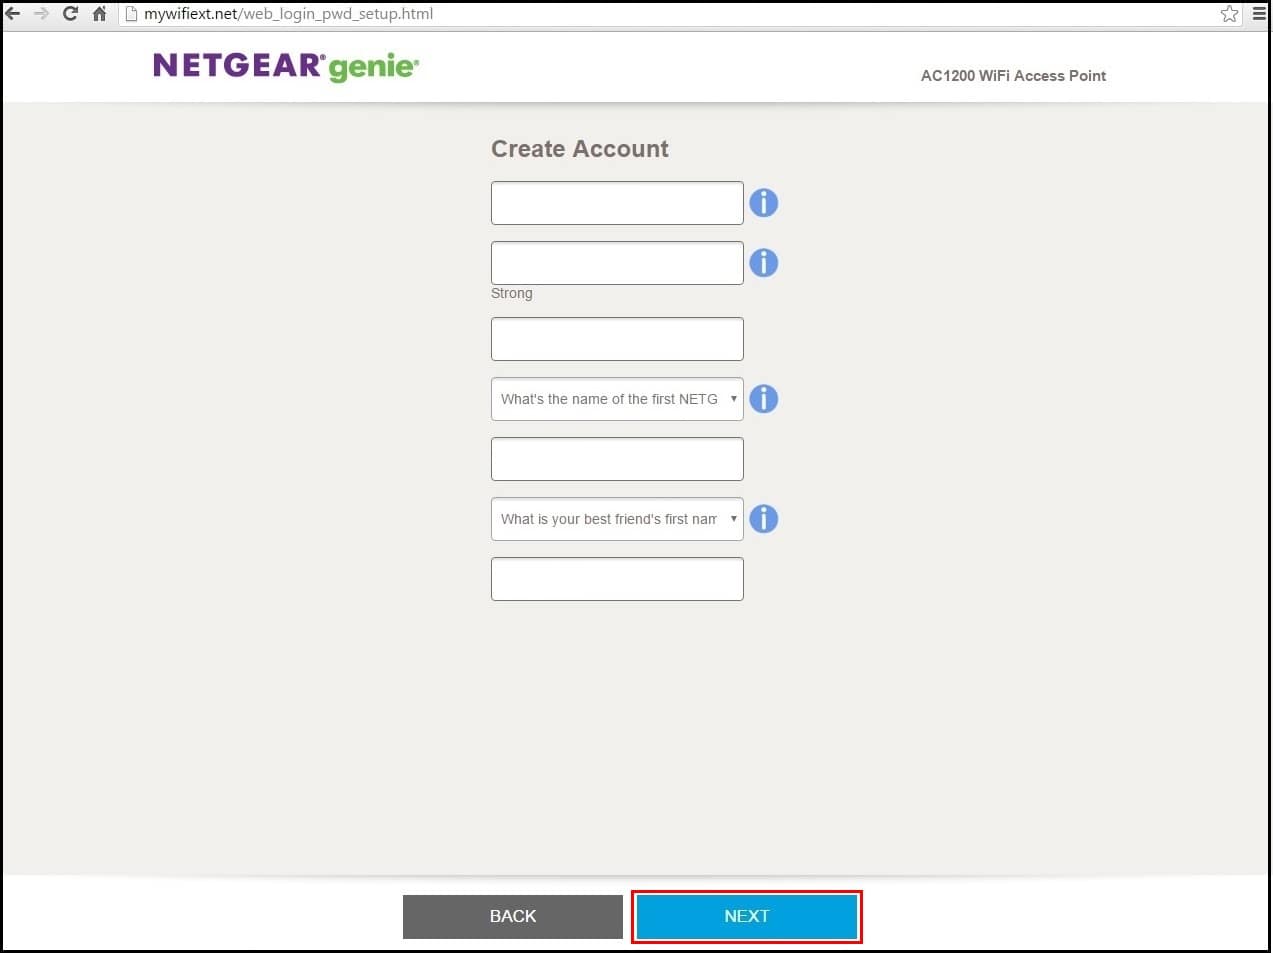
On a computer, open an internet browser. The browser can take you straight to the setup guide for the on-screen Netgear genie setup. You can also access it by typing in the URL bar of your browser, www.mywifiext.net.
Choose the name of your current wireless network to be expanded, and then press Proceed.
Enter your key or passphrase for the router and press Proceed.
If your wireless network does not appear, please check to make sure that your extension is within your main network’s wireless range.
Wait 2 minutes and your device gets disconnected from the wireless network automatically.
Go back to the Extender Genie screen once you have successfully linked your wireless computer/device to your network.
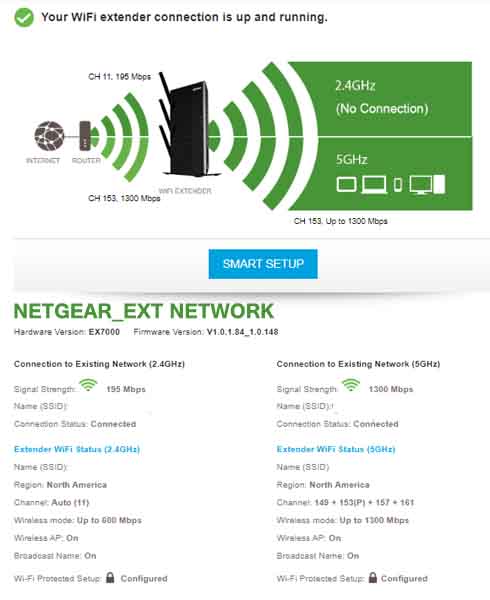
Your extender is now installed successfully if you see the ‘congrats’ page. Click Finish to close the setup page for the Netgear WN3500RP N600 extender.
You would be able to upgrade the WiFi at your home or company by following the same instructions. You can get advice from our experts if you are still having a difficult time during the Netgear WN3500RP Setup.
New Netgear WN3500RP Firmware Update
Does your WiFi Extender start acting oddly all of a sudden? Even after a good Netgear WN3500RP Setup, does it not provide the speed required? If so, upgrade the firmware to the Netgear Extender setup immediately. Netgear Extender Firmware is a compilation of built-in hardware device instructions. Netgear extender firmware, speaking in the language of a layman, is essentially an operating system explicitly intended to Use the specific make and model number of the extender. So, make sure that your extender has the new firmware update. Here’s how to update your firmware to Netgear WN3500RP:
Switch on your Netgear WN3500RP N600 WiFi extender, first and foremost.
Attach the extender to a router.
Once done, open a web browser as you prefer.
Now in the Address Bar type MYWIFIEXT.NET & hit the Enter button.
Use your username and password to log in to the extension.
Now in this step go to the Setup menu and choose the Firmware Update option.
Click on the Review button after that.
If new firmware versions are available, press the Yes button to update the firmware.
Now, wait and let the Netgear WN3500RP firmware update properly for some time.
It’s that! The firmware of your extender has been revised. Don’t hesitate to contact our EXPERTS.
Netgear WN3500RP N600 WiFi Extender Setup Issues
Mywifiext.net fails to function
Here you will see no Internet connection but connected to the wifi extender.
Unable to find the name of the Netgear range extender network
WN3500RP N600 Netgear-no internet
Unable to reset a Netgear extender
Netgear Range Extender WN3500RP SETUP With WPS Method
For the WN3500RP Netgear range extender setup using WPS:
Power on your WN3500RP extender Netgear N600.
In the same space, position the extender and WiFi router.
Plug your extender into an electrical socket until it’s finished.
Wait for the power LED to light green on the WN3500RP.
On the extender, press the WPS button.
The relation between your router and the extender is good if the Netgear WN3500RP Link Status LED lights are white.
Note: If the 5 GHz band is enabled by your router, the first time you push the WPS button, your extender attempts to connect to the router’s 5 GHz band. If your extender has not connected to the 5 GHz band of the router for the first time, during the setup of the Netgear N600 WN3500RP WiFi range extender, it may result in a lot of problems.
Switch to a different position with your extender.
Take your machine or mobile device with a WiFi-enabled connection to a spot with limited WiFi router coverage.
Link an expanded network to your WiFi-enabled machine or mobile device.
That is how you can use the WPS button to complete your Netgear WN3500RP Setup.
Netgear N600 Setup WN3500RP Steps for Troubleshooting:
To fix Netgear N600 WN3500RP setup problems, go through the troubleshooting steps listed below:
Make sure that the wall outlet receives the right power supply from the Netgear N600 WN3500RP extender.
Confirm that there is no damage or short-circuit to the wall plugin plugged in by the extender.
Access to your device’s high-speed Internet connection.
Check all the links on the cable. Do not use any cables that have been destroyed.
Now in this step try to keep your extender away from doors, room corners, microwave ovens.
Netgear EX6400 enhance the wifi signals in every part of your home where you face a lack of wifi signals. Usually, people believe the Netgear Extender Setup for extending WiFi coverage up to 2100 sq ft and attaches up to 35 devices such as PC, laptop headphones, IP cameras, ipads, etc. mywifiext supports seamless smart roaming Using the current SSID network name so that you never get separated as you switch through the home or workplaceMywifiext setup gives 1900Mbps dual-band bandwidth and advanced FastLane(TM) technology for streaming videos and playing high-quality games. The new extender setup has universal compatibility that tends to work with any wireless router, portal, or fiber optic. It is safe and secure and Supports wireless security features for WEP and WPA / WPA2. Here are the steps for establishing Netgear EX6400 using the web browser process:
Put your extender power cable into the wall socket., and wait until the color of the LED light switches green.
By accessing WiFi, connect it to your home wireless network.
Next, enter mywifiext.net in the web browser and tap on the new extender setup
Choose a wifi network that you want to enhance and press next.
Insert the specified network name and security settings and click the next button.
Connect devices to Netgear Extender Setup and continue by tapping Next.
You will now be able to establish EX6400 on your own by using the following steps. So it’s going to be able to experience the strengthened signals easily
Netgear EX6400 Setup through WPS Method
First Power on your Netgear EX6400 Extender.
Place your mywifiextand router next to one another.
Once finished, insert the EX6400 in the electrical outlet.
Wait till the LED power lits green in color
Press the WPS button on the Netgear EX6400 extender.
When the LED status of the extender is white, this indicates that the relation b/w the router and the extender is strong.