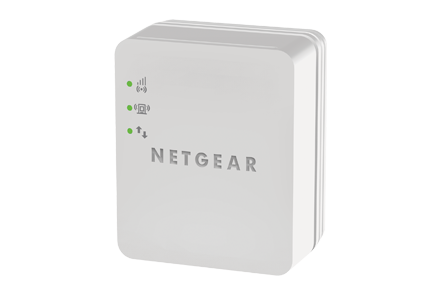
What is mywifiext.net

What is www.mywifiext.net

www.mywifiext.net

  www.mywifiext.net is the Web Url to connect with the Netgear wifi range extender. This web URL will help users to configure their brand-new extender to the existing wireless modem or router. Bring Netgear range extender setup to fix the Internet connectivity problems.

So, What To Do If www.mywifiext.net does not work?

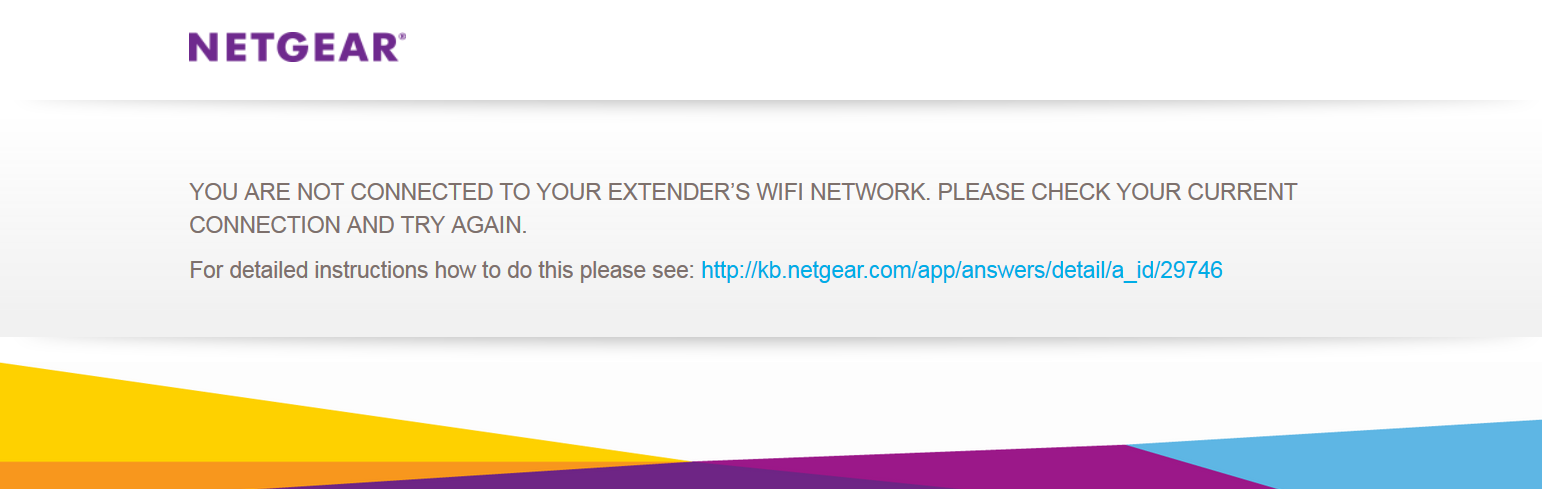
If you find yourself in the dilemma of being unable to get your extender up and running(while you have followed all the steps precisely), do not worry.

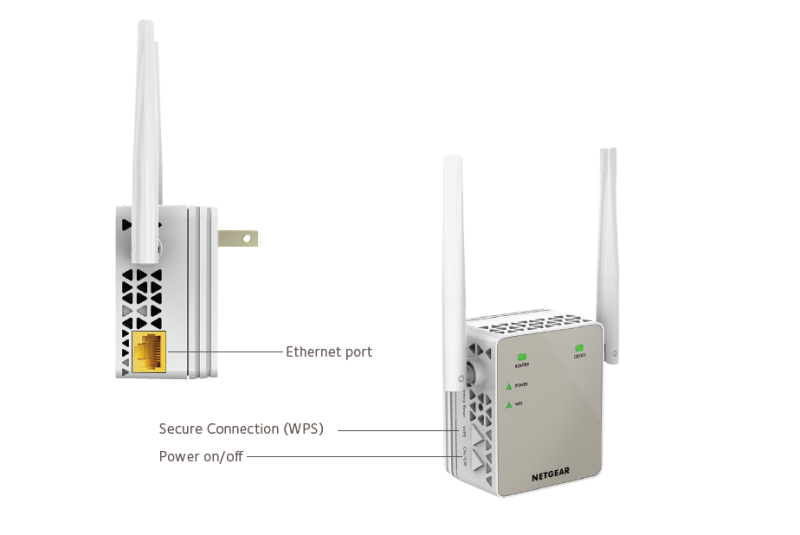
Follow this below-given instruction to reconnect to www.mywifiext.net
  • Plug the extender into the electric outlet.
  • Once you get the green light on your extender.
  • Now take a paper clip or a toothpick.
  • Push the factory reset pinhole for 5 – 10 seconds.
  • After releasing the paper clip or toothpick from your extender.
  • Wait for the green light to turn on.
  • Now try to access www.mywifiext.net
  • A new extender setup tab will appear to connect your Netgear extender.

After following this instruction if you’re still facing problems connecting to mywifiext. You can simply give us a call at our toll-free number 1-800-983-6723 and talk to a certified technician in real time. Our technician will assist you in letting your extender connect to www.mywifiext.net and get your extender operative in full swing.

How to create an account on www.mywifiext.net?

What is mywifiext.net   To create an account on the Mywifiext extender login page, a user needs to provide all these below-given details:
  • Enter a verified email address.
  • Create a login password and confirm the password
  • Select the first security question and answer it.
  • Select the second security question and answer it.
  • Click on Next to configure the range extender.
Netgear_Ext is not appear in the Network list

Why does Netgear_ext not appear in the Network List?

Netgear_Ext is not appear in the Network list
There could be a lot of causes for your ‘Netgear_ext not showing on network list’ problem. Here are a few examples:
  • Your internet connection is moving at the speed of a turtle.
  • You did not properly configure mywifiext.net.
  • Your Netgear range extender’s firmware has not been updated.
  • The distance between your extender and router is excessive.
  • You have not turned on the network connection.
Now that you know why your extender’s Netgear_ext SSID isn’t showing up in the network list, follow the steps outlined below to resolve the problem. If you want to skip the reading and receive an immediate solution to the problem you’re having with your device, contact our professionals.

How to fix: Netgear_Ext is not showing in the network list.

Close the gap between wifi devices (router and extender). To begin, measure the distance between your Netgear wifi range extender and your home router. Is it excessive? If the answer is affirmative, you now know where you went wrong. But don’t worry! reduce the distance between your wifi devices to resolve the Netgear_ext not appearing on the network list issue. Check that your wifi extender is within range of your router. Aside from that, make sure your gadgets have a solid connection.

Update the Netgear Firmware

As previously stated, an outdated firmware may also be the cause of your extender’s Netgear_ext SSID not appearing in the network list. So, without further ado, upgrade the firmware of your wifi booster right away! The following are the steps you should take to upgrade the firmware on your wifi device:
  • Turn on your PC.
  • Launch a web browser on it.
  • Go to www.mywifiext.net or 192.168.1.250.
  • Press the Enter key.
  • Fill in the default admin information.
  • Click the Login button.
  • Go to Settings after you’ve logged in.
  • Select firmware Update from the administration menu.
Once you’ve finished updating the firmware on your Netgear wifi extender, check to see if Netgear_ext is included in the network list. Still no joy?

Activate the Network Connection

Enabling the network connection may also assist you in resolving the problem you’re now having with your Netgear wifi range extender. To enable the network connection, perform the following steps:
  • Navigate to the Network adapter settings option.
  • Right-click on the SSID (network name) you want to use and select Properties.
  • After that, select Enable.
You’ll be able to eliminate at least one reason why your extender’s network name isn’t displaying on the list in this method.

Setup Your extender accurately

If nothing has worked so far, it’s most likely because you made a mistake during Netgear extender setup procedure using mywifiext.net. Thus, properly install your WiFi equipment while keeping the following considerations in mind:
  • All cable connections must be finger tight.
  • Make sure you’ve updated your web browser before logging in to your Netgear extender.
  • Avoid inputting the default login credentials incorrectly. Contact us if you are unsure of your device’s default username and password!
Let’s hope the troubleshooting tips in this post helped you resolve the ‘Netgear_ext not showing on network list’ issue. If you’re stuck with the same problem, our professionals are here to help you 24 hours a day, 7 days a week.
Netgear Extender Setup

Netgear_ext

Netgear_Ext Setup

After completing the Netgear WiFi extender settings, you will be given the expanded SSID, Netgear_Ext. To rejoin your WiFi range extender through WiFi.

Follow these steps:

  1. Restart the range extender.
  2. Connect to the NETGEAR_EXT SSID, the extender’s default WiFi network.
  3. Start your computer’s web browser.
  4. Enter mywifiext.net into the address bar of your web browser.
  5. Enter or click the Search button.
  6. The login page appears.
  7. Enter your e-mail address and password.
  8. Follow the on-screen instructions to reconnect your extension to your home network.

If your router employs WEP security, enter the Netgear ext (SSID) and password when requested.

New Extender Installation Requirements

The Netgear range extender setup process is extremely simple. But, before you begin with the Netgear Extender Setup, you must have the following items on hand:

  • The proximity of the extender to the router. The extender and the existing WiFi router should be placed in the same room.
  • The WiFi range extender requires a steady and fluctuating power supply from the wall socket.
  • Then, throughout the Netgear Extender Setup process, you must have access to a high-speed internet connection.
  • Following that is an internet browser. It is recommended, however, that you install more than two web browsers on your computer or laptop.
  • It is possible that you are unable to access the default Netgear Extender Login page due to a problem with your web browser. In this case, you can use another browser (you have options!).

Once you have all of these items, you are ready to begin the Netgear Extender Setup process.

How to access to Netgear_Ext ssid: Guide

NETGEAR_EXT

To access the wireless network, follow the steps mentioned below: Now, wait until the status of the power LED image indicates a green signal. Here, the default name of your wireless extender network is Netgear_ext. The following manual discusses major problems that you can experience during the setup process. You may follow these clear instructions to install your computer and configure it without any trouble.

  • Restore your wireless device to its factory default settings.
  • Now get connected through a WiFi connection to the computer.
  • You will now be prompted to fill in the username and the default password for Netgear_ext.
  • You can contact us using the chat window at the bottom of this page if you need help with your 192.168.1.250 Netgear extender device.
  • Next, carefully follow the installation prompts of mywifiext.net login for local IP address 192.168.1.250 and create a strong connection to your current router.
  • Now, all your WiFi devices are connected to the network you have just installed.

Connect your WiFi devices to the Netgear extender once more.

Still having trouble configuring your Netgear WiFi Extender?Don't put off contacting our skilled and trained professionals. We will gladly walk you through how to set up a Netgear WiFi extender and assist you in troubleshooting and resolving Netgear WiFi extender setup issues in a matter of minutes. Furthermore, we use cutting-edge remote PC tools to handle any of your technical concerns in real time. Simply contact us to be free of problems with your Netgear booster setup.

Netgear Ext is not Showing Up in the Network List? 


Don’t you despise it when the name of your Netgear extender isn’t displayed in the network list? If you answered yes, then it’s time to relax those worry lines on your brow because our experts are here to assist you. In this blog post, we’ve discussed the most common reasons why your Netgear text isn’t showing up in the network list, as well as solutions to the problem. So, what are you holding out for? Let’s get this started.

NETGEAR_EXT

Reasons Why Netgear_Ext doesn’t appear in the network list

There could be several reasons why your WiFi range extender’s name isn’t showing up on the network list. Some of the most important contributing factors are as follows:

  1. Inadequate internet service
  2. Network connection has been disabled.
  3. Installation of a partial extender
  4. Firmware that is outdated or corrupted
  5. The distance between the extender and the router is measured in kilometers.

Now that you know what might have caused the problem, let’s look at the various ways to troubleshoot it.

Why is my smartphone not connecting to Netgear_Ext?

Netgear EX6150 firmware update

Netgear range extenders have simplified everyone’s lives by providing consumers with a stable internet connection.

All you have to do is connect your wireless devices to the extender’s Netgear ext and you’re ready to go. But what’s the deal with the stress lines on your brow? It appears that you are having problems with your Netgear WiFi extension. Is your smartphone unable to connect to the network of the extender? If you answered yes, we’ve got you covered.This article will provide you with several ideas and tricks for quickly resolving the problem. So, roll up your sleeves and continue reading.

Resolved: Smartphone Isn’t Connecting to Netgear Ext

Method 1: To begin resolving the issue, reboot your Netgear WiFi extender. Perhaps your WiFi device has had minor faults that have resulted in the problem you’re currently experiencing. Fortunately, you can remove them simply by restarting your extension.

Consider turning off your wireless extender, letting it rest for a time, and then turning it back on. Once your Netgear range extender has rebooted, check to see if you are still having problems connecting your smartphone to the extender’s Netgear_ext2.4Ghz or Netgear_ext_5Ghz.

Quick Tip: Technical issues can also affect your smartphone. As a result, consider resetting your mobile device as well.

Method 2: Do you have a lightning-fast internet connection? Most likely not. Your internet connection may be disrupted owing to a faulty connection between the extender and router or a problem on the end of your ISP. So, first, check the connection between your WiFi devices. Bring them closer if they are too far away. If possible, use an Ethernet cable.

However, if the connection between your Netgear extender and router is stable, our second assumption may be correct. As a result, call your ISP to see if the problem has occurred on his end. Give him some time to rectify the problem if he accepts that it is his fault.

Netgear_ext common issues

Users frequently report problems with their Netgear extenders. The following are some of the most common Netgear extender problems:

  • The extender is not turning on.
  • Red light on Netgear powerline extender.
  • The WiFi extender is getting hot.
  • Ping is being caused by a WiFi extender.
  • Password for Netgear extender login has been forgotten.
  • IP address 192.168.1.250 is not working.
  • The 5GHz Extender is not working.
  • Flashing orange light on the extender.
  • Two extenders cannot be connected.
  • The Extender is not connected to the PS4.
  • Netgear extender reduces download speed.
  • WiFi extender prevents access to websites.
  • Extender is unable to connect to the router.
  • The Netgear extender is constantly disconnecting.
  • WiFi extender is unable to connect to the internet.
  • The Extender LED continues to blink.
  • The password for the Netgear extender is not accepted.
  • mywifiext.net does not respond.
  • The Netgear extender is unable to locate an IP address.
  • The WiFi extender is not working.
  • Connection problems with WiFi extender.
  • WPS red light.
  • WiFi extender not found.

Please contact our experts if you are experiencing any of the aforementioned problems. They are working around the clock to ensure that you have a fantastic experience with your extender.

Netgear ex6150 setup

Netgear EX6150 Setup

Netgear ex6150 setup

Complete guide for Netgear EX6150 setup

With the Netgear EX6150 setup, you may extend your existing WiFi range to every part of your home. The Netgear EX6150 AC1200 WiFi range extender extends the radius of your existing network and provides continuous WiFi speeds of up to 1200Mbps (Megabits per Second). It works with any normal WiFi network and is great for large houses, as well as hassle-free HD movie streaming and online gaming.

Netgear EX6150 Manual: When you purchase a new Netgear EX6150 AC1200 range extender, it comes with a manual. From beginning to end, the Netgear EX6150 WiFi extender handbook comprises of a sequence of Netgear AC1200 setup instructions. Simply follow the Netgear EX6150 setup instructions in the handbook to get your EX6150 extender up and running. But wait a minute! Understanding the Netgear EX6150 extension instructions can be challenging for a novice. Chat with our experts today to install Netgear EX6150 WiFi range extender without any issues.

Netgear EX6150 extender setup via WPS

If you want to setup your Netgear ex6150 range extender using the WPS method, please follow the instructions given below:

  • Tap the WPS button on your Netgear ex6150 extender for only 5 minutes till the WPS light flashes.
  • In about 2 minutes, tap on the WPS button on the host router or main Wi-Fi.
  • Whether your Wi-Fi router has the 5 GHz band, redo the Steps 1 and 2 to attach with Netgear ex6150 extender to the 5 GHz signal.
  • Take off Netgear ex6150 extender and place it anywhere you want which is almost from your Wi-Fi to the location with a bad router WiFi connection.
  • Turn on Netgear extender by plugging the power socket and stand by till you see the Power light turn green.
  • Look at Router Link light for getting a location where the Netgear ex6150 signal is stable.
  • Whether the Router Link light does not turn to amber or green, attach Netgear ex6150 extender to the nearest power socket to main Wi-Fi and redo the steps.
  • Now on PC or smartphone, look for and attach with the Netgear EX6150 extender network.
  • You can check Netgear extender by placing the laptop or smartphone to the location with a bad main Wi-Fi signal.
www.mywifiext.net

How do I connect my Netgear ex6150 extender to Wi-Fi?

This is the second way to attach your Netgear ex6150 wi-fi range extender to your main Wi-Fi router by using the internet browser, so follow the steps given below:

  • Firstly, you have to power on the Netgear EX6150 extender.
  • Move Netgear extender near to the main Wi-Fi box.
  • Next you will turn on Netgear ex6150 by attaching it to the power socket.
  • Stand by till the Power light turns green.
  • Whether the Power light does not turn on, tap on the Power button.
  • Attach the PC or smartphone to the ax6150 extender to the main Wi-Fi network.
  • Open up the internet browser from a laptop or smartphone and type in www.mywifiext.net.
  •  Netgear installation assistant will be shown.
  • Obey all the steps to attach the Netgear ex6150 extender to the main Wi-Fi network.
  • Place the ex6150 extender to any place that is about half between the main Wi-Fi and a place where there is a bad Wi-Fi network.
  • Whether there is no connection or a bad connection, place Netgear ex6150 extender closer to your router and reconnect till the Link Status light turns to white.
  • When you finally find the best location for Netgear ex6150, attach all the devices to the Netgear ex6150 extender.

How to factory reset my Netgear ex6150 extender?

Whether you have any problem or issue with your Netgear ex6150 extender and you want to factory reset it, just go with the steps given below and your Netgear ex6150 range is reset easily.

Netgear EX6150 reset

Whether you have any problem or issue with your Netgear ex6150 extender and you want to factory reset it, just go with the steps given below and your Netgear ex6150 range is reset easily.

  • Open up PC or any smartphone that is attached to the Netgear ex6150 network, now open any internet browser.
  • In the website bar of the web browser, put in www.mywifiext.net.
  • Type in the email address and password and tap on the LOGIN option.
  • Whether the internet browser shows the Menu option, tap on it.
  • Choose Settings which is under Other Settings.
  • Tap on the RESET option.
  • Now your Netgear ex6150 extender is set to factory default settings.

Netgear ex6150 Wi-Fi Extender | Firmware Update

These are steps to follow when you want to upgrade your Netgear EX6150 wi-fi range extender firmware, the process is very easy and simple.

  • Open up PC or smartphone that is attached to Netgear ex6150 extender, open any internet browser.
  • Type in this in the website bar of browser www.mywifiext.net.
  • Type your email address and password and tap on the LOGIN option.
  • Whether the browser shows the Menu option, tap on it.
  • Choose Settings and under its Firmware Update.
  • Tap on CHECK ONLINE option.
  • Whether the latest firmware is there, obey all the steps to download it to your Wi-Fi enabled device.
  • Tap on the BROWSE option.
  • Now, choose the latest firmware that is downloaded.
  • Tap on the UPLOAD option.
Netgear EX6150 firmware update

Netgear EX6150 configuration common issues

Here are some common issues that users may encounter while setting up Netgear wifi extender:

  • Netgear EX6150 is not working on a Mac or an iOS smartphone.
  • The WiFi extender is connected, but there is no internet connectivity.
  • The Netgear extender’s default web URL is not working.
  • The WiFi extender is disconnected from the network.
  • MAC address filtering errors.
  • The Netgear genie app does not start.
  • Mywifiext.net is currently unavailable.
  • Mywifiext.com is not operational.
  • I’m unable to connect to the Netgear EX6150 repeater.
  • The Netgear Extender is not functioning properly.
  • There are issues with WiFi connectivity.
  • The WiFi extender cannot connect to the internet.
  • Netgear extender’s red light issues.

Netgear ex6150 extender troubleshooting steps

The following instructions give the troubleshooting steps for your NETGEAR ex6150 Wi-Fi Range Extender if sometimes any type of issue persists in your Netgear ex6150 range extender.

  • Whether you don’t remember the username or password, tap on Username & Password Help option.
  • Whether the internet browser shows the error page, put in http:// in the website bar of the web browser by putting in http://www.mywifiext.net.
  • Whether you did setup the Netgear ex6150 extender but it can’t attach with the main WiFi network, look to see whether your Device Link light is off or could be red. 
  • Whether it is off try placing the PC or smartphone near to Netgear ex6150 extender.

If you don’t have WiFi network working, you will have  to get an Ethernet cable to attach  the PC to Netgear ex6150 extender.

NETGEAR EX6150 Setup – Mywifiext

  • Turn on the extender and wait for the power light to boot up.
  • Use any wifi device like a tablet, cellphone, laptop or kindle.
  • Go to the wireless setting option on your respective device.
  • Look for the Netgear_ext on the list of available networks.
  • Connect your device with Netgear_ext.
  • Now open any web browser on your wifi-enabled device and type www.mywifiext.net
  • Netgear Ex6150 New extender setup page will appear on your screen
  • Create a login account and follow the instructions to connect your Netgear AC1200 Setup.

How to enable Fastlane technology after Netgear EX6150 AC1200 setup?

FastLane Technology ensures that you get the greatest WiFi performance possible. Essentially, it provides a high-speed WiFi connection via a dedicated band that connects the WiFi router to the extender and a second band that connects the WiFi device to the extender.

The Netgear EX6150 FastLane is configured as follows:

Netgear fastlane setup
  • Connect your client device to a WiFi network.
  • Then, open a web browser like Microsoft Edge, Google Chrome, or Internet Explorer.
  • Navigate to the login page for the Netgear AC1200 EX6150 extender.
  • Enter your username and password when prompted.
  • Select the ‘FastLane’ option on the Netgear Genie page.
  • You will now be presented with two choices: ‘Device-to-extender only in 2.4 GHz and extender-to-router only in 5 GHz’ and ‘Device-to-extender only in 5 GHz and extender-to-router only in 2.4 GHz’.
  • Select an option and then press the Save button.

If you are stuck at any point while enabling FastLane Technology on your extender, please contact our specialists right away.

Netgear EX6150 hard reset process

If you have an issue or a problem with your Netgear ex6150 extender and wish to completely reset it, simply follow the procedures mentioned below to easily reset your Netgear ex6150 extender.


  • Launch any web browser on a PC or smartphone connected to the Netgear ex6150 network.
  • In the address box of your web browser, type www.mywifiext.net.
  • After entering your email address and passcode, click the LOGIN button.
  • If the Menu option displays in the internet browser, select it.
  • From the Other Settings menu, choose Settings.
  • Choose the RESET option.

The factory default settings for your Netgear ex6150 extender have now been restored.

Table of Contents

Netgear extender setup

How can I Install Netgear WN1000RP?

Usually known as a wireless repeater, the Netgear WN1000RP aims to increase the speed of your existing WiFi network. During the Netgear extender setup process, devices (wireless routers and wireless computers) must be installed in the same space. You may transfer them to their appropriate position once completed, just within the radius.
  1. Plug the router and the Netgear WN1000RP into an electrical outlet close to each other.  
  2. Use a wireless network on a wired or wireless system to connect to the SSID network until the light status on your WN1000RP is solid green.
  3. The light will turn solid green once the connection with your wireless device is recognized. Then, you can attach the WiFi booster to your network.
  4. Next, all you have to do is open an internet browser and type www.mywifiext.net in the address bar.
  5. It will take you directly to the setup page on-screen.
  6. The above-mentioned website and IP address still allow you to customize your WiFi booster settings. But the necessity is that you need to be connected to your network of Mywifiext.
  7. Select the main WiFi router name and hit Continue.
  8. Again, after typing the network key, click on Proceed.
  9. By filling all the credentials and then hit Proceed, add all the extender settings.
  10. You can change your current network’s wireless settings as well.
  11. On the Netgear WN1000RP, add the settings.
  12. You can connect your wireless devices to the recently developed wireless network once the settings have been successfully implemented.
  13. Once linked, search the box adjacent to ‘My wireless devices are linked to the Netgear extender setup.
  14. Press the continue option.
  15. The Internet is ready for you to use now. Select the finish and access the internet.
  16. Hence your Netgear WN1000RP completely installed. In, case you still face issues contact our highly experienced experts.
Netgear wn1000rp setup

Netgear WN1000RP setup using the WPS method:

By pressing the ON / OFF button located on the side panel of your Mywifiext, plug your Netgear WN1000RP extender into an electric socket and wait for the LED lights on the extender to turn solid green.
  1. Push the button for WPS.
  2. Push the WPS button on your wireless router within one to two minutes.
  3. The confirm the details LED will become available once the connexion between both the devices (router and extender) is recognized.
  4. When a wireless system is connected to the Netgear extender setup, the WiFi light booster system is turned on.
  5. No need to get hyped or irritated if you are still interested in troubleshooting the two processes above and have not been set up. All you need to do is just grab your phone and call us now on our toll-free.