Netgear extender reset

A Step-by-Step Guide to Resetting a Netgear Extender

A Step-by-Step Guide to Resetting a Netgear Extender

Netgear extender reset is the process of restoring the device to its factory default settings. This is done by using the reset button on the wifi extender, which is typically located on the bottom or back of the device.

When the reset button is pressed and held for a certain period of time, the device will erase all settings and information, including the password, and reboot to its default state. You can also reset your Netgear wifi extender by using a web browser.

Netgear extender reset

Why do we need to reset the netgear extender?

There are several reasons why you may need to reset a Netgear wifi extender:

  • Troubleshooting: If you are experiencing issues with your wifi extender, such as poor performance, connectivity problems, or if it is not working as expected, resetting the device can help to resolve these issues by restoring the device to its factory default settings.
  • Forgotten login credentials: If you have forgotten the login credentials for your wifi extender, you will not be able to access the device’s settings. Resetting the device will erase the login credentials and allow you to set a new password.
  • Selling or giving away the device: If you are selling or giving away your wifi extender, you will want to reset the device to erase all of your personal information and settings.
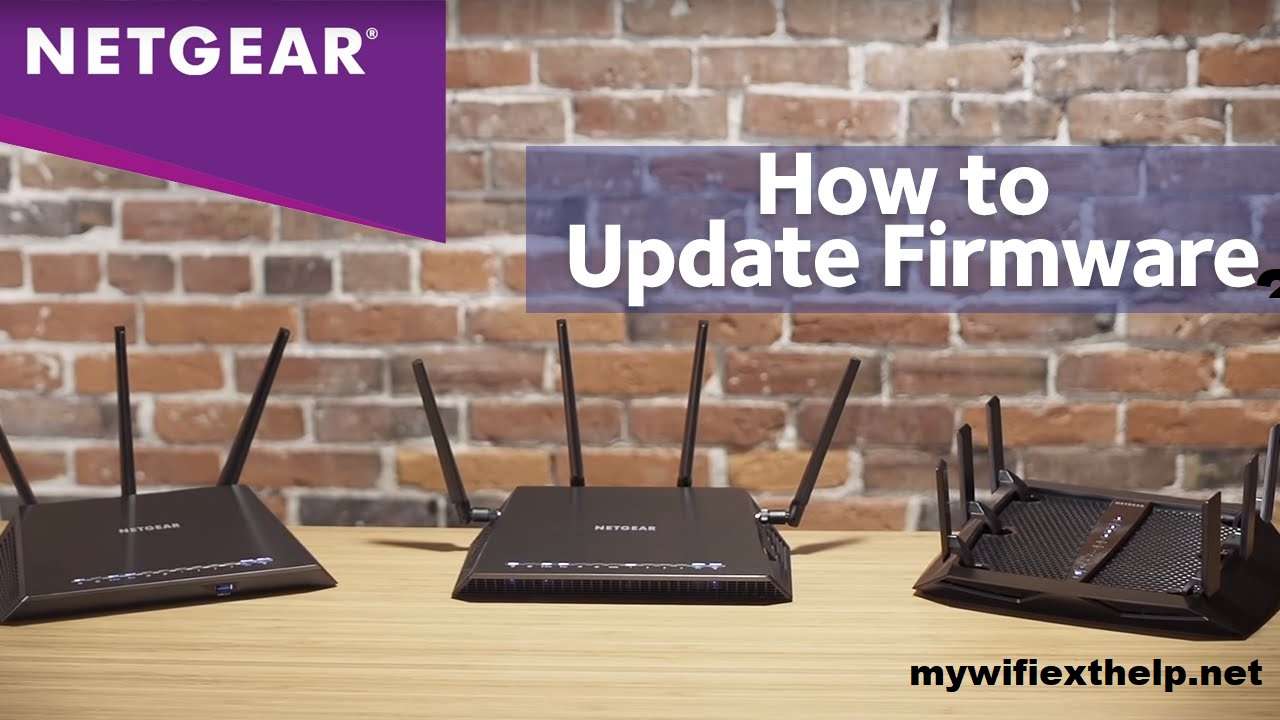
  • Updating firmware: If you’re having trouble updating the firmware of the extender, a factory reset might help.
  • Factory Reset may help in case of compatibility issues with the extender.

It’s important to note that resetting the wifi extender will erase all settings and information on the device, including the password. Be sure to have a backup of the settings before resetting the device.

There are two methods to reset Netgear extender:

  • Reset Netgear extender through web browser.
  • Reset Netgear extender through reset button.

Netgear extender reset | Web browser

The Netgear Extender reset process can be done by using this technique. It is one of the most popular and simple techniques that will enable you to complete this task at home without the aid of outside assistance. To achieve the best outcome, all you need to do is make sure to complete each step exactly as directed without making any mistakes. To reset Netgear extender, follow these steps:

  • Your Netgear WiFi Extender must be powered on to begin the process.
  • After that, you must turn on your computer or laptop and launch the web browser.
  • Navigate now to the Netgear Extender’s default web interface.
  • When the login window appears, enter all of your login information and select Log In.
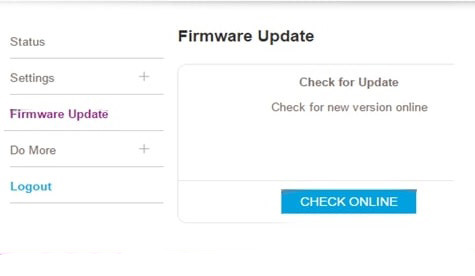
  • Once finished, select Factory Reset from the Netgear Smart Wizard’s opening menu.
  • To confirm your choice, select yes.

Netgear extender hard reset

You can switch to this method if the methods mentioned above are too challenging for you to use. Resetting a Netgear Extender is done using this method the most frequently. To RESET Your Netgear extender follow these steps:

Netgear extender hard reset
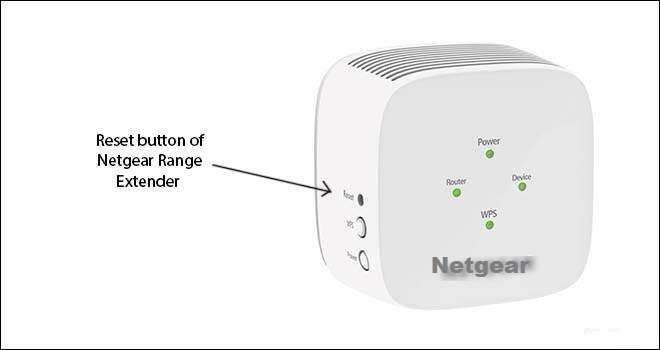
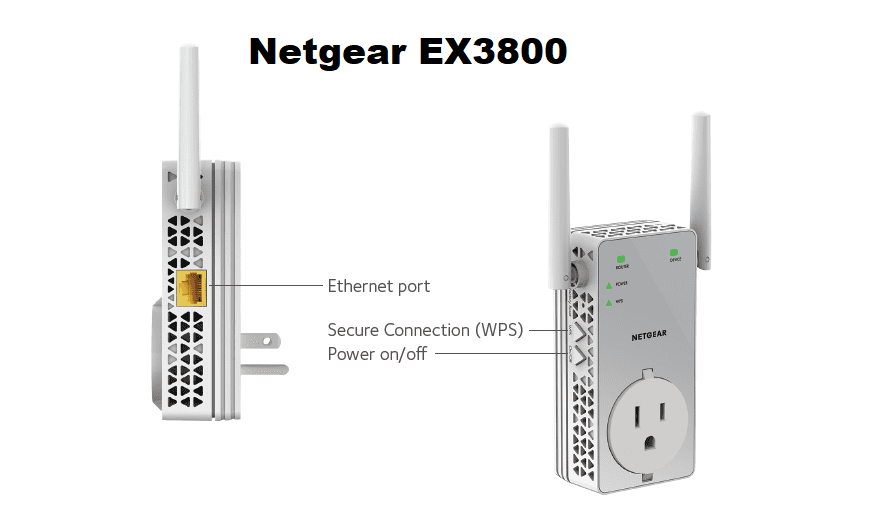
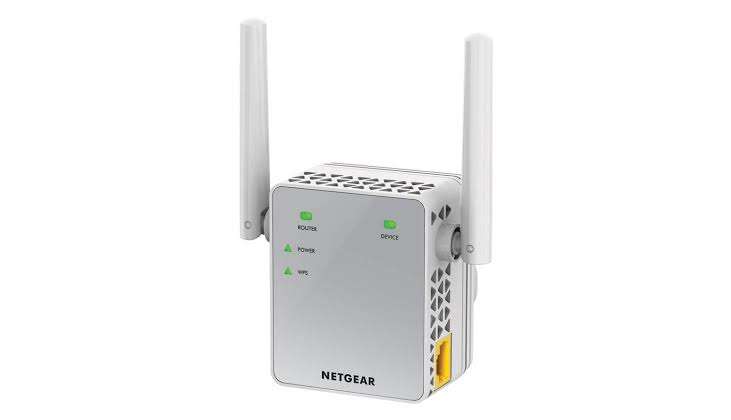
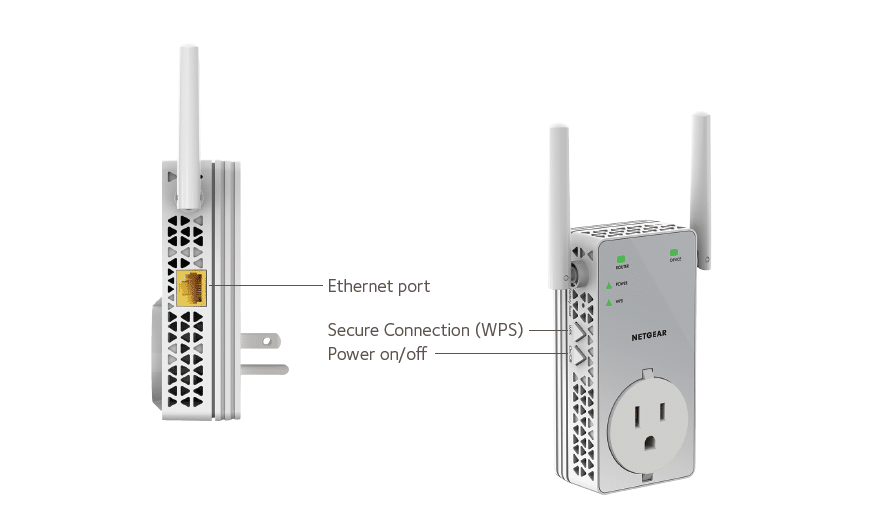
  • On the back of the extender, locate the “Reset” button.
  • The “Reset” button must be pressed and held down for at least 10 seconds.
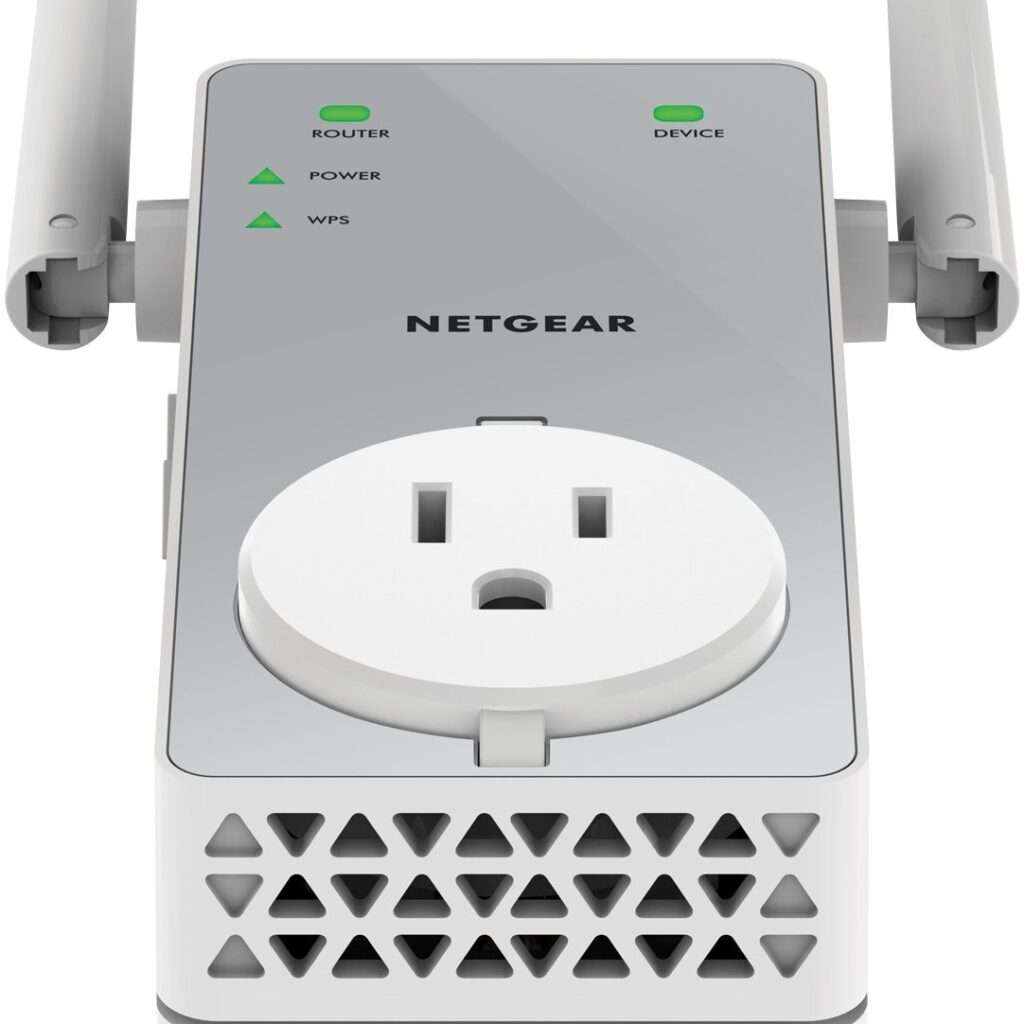
  • The extender’s lights will flash to indicate that the reset process has begun.
  • Release the reset button. The extender will restart with all lights off.
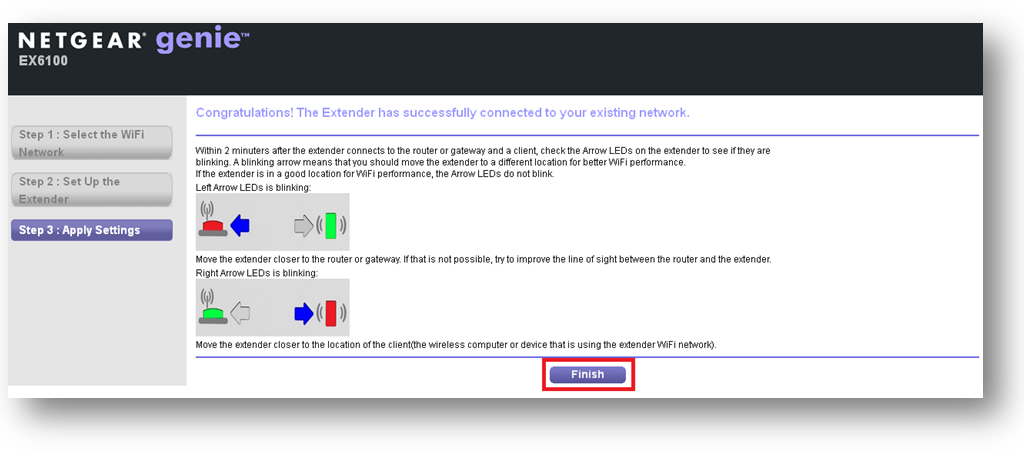
  • When the extender restarts and the power LED light turns fully green, wait to move.
  • Use a computer or mobile device to connect to the extender’s default network (the network name will be “NETGEAR_EXT”).
  • Open a web browser and type “mywifiext.net” into the address bar to go to the extender’s setup page.
  • Follow the on-screen directions to set up the extender and connect it to your existing network.

Netgear extender not connecting to internet

If your Netgear WiFi extender is not connecting to the internet, one of the following could be the cause:

  • The device is not properly configured.
  • The WiFi range extender’s software or hardware is faulty. As a result, the Netgear extender is unable to connect to the internet on Windows 7/8/10, Linux, Mac, or other operating systems.
  • The cable connections are messy.
  • Another reason is interference in the path of the extender’s signals.
  • The extender has been installed in a dead zone.
  • Your network adapter’s connection status is poor or non-existent.
  • An orange LED light is visible on the extender.
  • Netgear extender firmware is out of date.

Here’s hope that you now know the factor causing WiFi connectivity problems. However, if everything is in order on your end, follow the steps outlined below to resolve the issue.

Let’s fix Netgear extender not connecting to internet

Without further ado, let’s get started troubleshooting the issue:

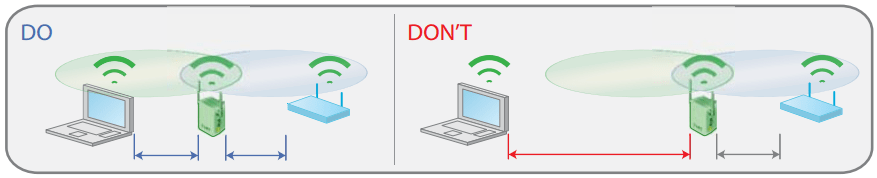
  • Keep your WiFi extender away from devices that cause interference, such as microwaves, Bluetooth devices, cordless phones, metal objects, mirrors, glasses, fish tanks, and so on.
  • Examine the LED lights on your extender and router. If the power light is red, it means that your WiFi extender is not connecting to the router.
  • A blinking orange LED light indicates that the extender is connected to the router but no internet/WAN is available.
  • Is there a problem with the LED lights on the extender and router? Check for loose connections or plugins.
  • Reboot your PC, modem, computer, laptop, extender, and router to see if this resolves the issue.
  • If the error persists, go to www.mywifiext.net and check to see if the extender firmware has been updated.
  • Finally, perform the Netgear extender reset. Simply press the reset button on your device to restore all of the factory default settings.

Click here for more information about:

Netgear extender setup.

Netgear EX6400 setup.

Netgear EX3800 setup.

192.168.1.250.

Netgear EX3800 setup

Netgear EX3800 Setup

Configuration For NETGEAR EX3800 Setup Via- mywifiext.net

Wireless rates of up to 750Mbps (Megabits per Second) can significantly increase the range of your home internet connection by finalizing the Netgear EX3800 setup. FastLane technology eliminates interference caused by concurrent dual-band technology, allowing you to construct a very high-speed internet connection using both WiFi bands. The Netgear EX3800 AC750 extender is compatible with any standard WiFi router. With the Netgear AC750 Setup, you can say goodbye to dead zones.

Setup of a Netgear wifi extender can be accomplished in one of two ways:

  • Manual setup (Web browser setup).
  • Wireless protected setup (WPS).
Netgear EX3800 setup
Netgear EX3800 manual configuration

To complete the Netgear EX3800 setup, follow these steps:

  • Ascertain that the Netgear EX3800 range extender is powered on.
  • Keep your WiFi extender close to your router.
  • Connect your extension cord to a power outlet.
  • Allow for the power LED to become green.
  • Connect the Netgear AC750 extension to a router.
  • Navigate to www.mywifiext.net or 192.168.1.250 on a PC or mobile device using a web browser.
  • The Netgear genie smart setup wizard now appears on the computer screen.
  • Follow the on-screen directions to connect your extender to your existing WiFi network.
  • Reposition your extender.
  • If you experience connectivity issues with your router, move the extender closer to it and retry until the Link Status LED becomes white.
  • Connect your client devices to the expanded WiFi network once you’ve determined the ideal location for your EX3800 extender.

If you continue to have difficulty finalizing Netgear EX3800 setup, please contact one of our technical specialists.

Netgear wifi extender setup | AC750 EX3800

Using the WPS button

To perform Netgear wifi extender setup using WPS button, follow these steps:

  • On the Netgear AC750 EX3800 range extender, turn it on.
  • Install the WiFi extension in the same room as the router.
  • Connect your range extender to a power outlet following that.
  • Wait for the Power LED on your EX3800 to turn a constant green.
  • Press the WPS button on the extender.
  • If the Netgear AC750 Link Status LED is white, your router and extender are correctly connected.
  • Bear in mind that if your router supports the 5 GHz band, your extender will attempt to connect to it the first time you press the WPS button.
  • If your extender does not connect to the router’s 5 GHz band the first time during Netgear AC750 setup model EX3800, it may cause a plethora of problems. Contact our specialists immediately to resolve such issues.
  • Adjust the position of your extender.
  • Connect to the expanded network using a WiFi-enabled PC or mobile device.

In this way you can setup your Netgear EX3800  using the wireless protected setup (WPS) within just a couple of minutes.

Netgear EX3800 Firmware update

Is your wireless adapter behaving strangely? Is your Netgear AC750 EX3800 WiFi extender still unable to deliver the needed speed following installation? If this is the case, you must immediately update the Netgear AC750 firmware. The Netgear Extender’s firmware is a set of instructions included in the hardware device. In layman’s words, Netgear extender firmware is a type of operating system that is optimized for use with your specific brand and model number of extenders. As a result, ensure that your extender is running the latest firmware version.

Follow the steps below to update the firmware on your Netgear EX3800:

  • To begin, turn on your Netgear AC750 EX3800 WiFi extender.
  • Connect the extender to the router via the Ethernet cable.
  • Then, open your web browser of choice.
  • Enter mywifiext.net in the browser URL bar.
  • To obtain access to your Extension, enter the username and password you created.
  • From the options menu, select Firmware Upgrade.
  • Then, click on the Check button.
  • If a new firmware version is available, select yes to upgrade the firmware on your extender.
  • Allow for the proper firmware update of the Netgear AC750.

This brings our conversation to a close. Your Netgear wifi range extender’s firmware has been updated successfully. Kindly contact our specialists if you encounter any difficulties.

Netgear EX3800 firmware update

Netgear extender setup | EX3800

Using the Netgear Nighthawk app

Nighthawk app setup

The Netgear Nighthawk app may now be used to setup and connect the AC750 EX3800 WiFi range extender to the internet. This software is compatible with both Android and iOS operating systems. The Netgear Nighthawk setup is very easy to perform.

Follow these steps to complete the Netgear EX3800 Setup using the Netgear Nighthawk app:

  • To begin, double-check that your router is connected to the internet.
  • Take note of the SSID, or network name, of the router, as well as the password.
  • Now is the time to turn on your Netgear AC750 EX3800 range extender.
  • Download the Netgear Nighthawk app to your Android or iOS smartphone.
  • Then, on your smartphone, launch the previously downloaded Nighthawk app.
  • To configure your wifi booster and connect to the internet, follow the on-screen instructions.

Netgear EX3800 reset through web browser

Have you experienced connectivity issues with your Netgear AC750 EX3800 range extender? Is it behaving strangely? Perhaps you’ve misplaced your administrator’s password. If any of these questions are yes, you should reset your extension. This article will demonstrate how to reset a Netgear EX3800 extender using two time-tested methods.

This is how it is accomplished:

  • Connect your Netgear AC750 EX3800 to the power source.
  • Open an internet browser of your choice on a computer or laptop.
  • Navigate to the default web user interface for your Netgear extender.
  • A login screen will be displayed to the user.
  • Type in the required information.
  • You are now on the Netgear genie page.
  • Select Factory Reset from the drop-down menu.
  • A confirmation screen will appear.
  • By selecting Yes, you confirm your selection.
If you have any trouble resetting Netgear Extender, kindly get in touch with our certified expert

Steps for troubleshooting the Netgear EX3800

Use the following troubleshooting steps to address Netgear EX3800 setup issues:

  • Ascertain that the Netgear AC750 EX3800 extender receives an adequate supply of electricity from the wall outlet.
  • Ascertain that the wall outlet into which the extension is plugged is not damaged or shorted out.
  • Conduct a thorough examination of all electrical connections. Any cable that has been damaged should be used at your own risk.
  • Maintain a safe distance between your extension and walls, room corners, microwave ovens, fish tanks, cordless phones, Bluetooth devices, metal objects, aluminum studs, and similar items.
  • If you’re having problems with mywifiext.net, double-check that you’ve entered the correct URL in the address field.
  • Reboot your Netgear AC750 EX3800 and attempt configuration once more.

If you are still in a trouble don’t be ashamed to contact our technical experts via live chat or our toll free helpline number.

Tricks to increase the performance of a Netgear wifi extender

Tricks to increase the performance of a Netgear wifi extender

Tricks to increase the performance of a Netgear wifi extender 

Tricks to increase the performance of a Netgear wifi extender

In this blog, you will find detailed instructions on how to improve the Netgear extender’s performance. Are your wifi router signals being disrupted by items in your home? In essence, both the wifi range extender and router emit magnetism waves that can be detected and modified by your controlled devices to provide high-speed internet web access throughout your home. However, several customers have reported problems with their Netgear extenders in recent years. They simply perform a Netgear wifi extender factory reset to repair it. However, this is not the only option.

However, you can easily improve the Netgear extender performance. This is the main problem for any user who is unable to use mywifiext setup.So, here are some steps you can take to strengthen the property of your network.

Let us now move on to the other important factors that may help you improve the Netgear extender performance:

Place your Netgear wifi range extender at a new position

Have you tried to figure out why your local area network signals stop working at times? All of this happens because some network areas are unaffected by your router’s signals or are out of network range. Some dead patches remain even after activating the wifi range extender. Why?

The presence of solid objects such as walls, doors, and electronic devices such as microwaves, TVs, radios, and so on near your range extender causes these dead spots. Additionally, the presence of these objects near the extender device prevents the boosted signals from reaching all areas of your home. Visit mywifiexthelp.net and look for a central location for the extender.

Update the firmware of your Netgear extender

Out-of-date firmware is one of the most common causes of your Netgear extender’s wifi connectivity issues. As a result, upgrade the firmware on your device by accessing the Netgear extender default IP address right now! You don’t know how to do that? That is not a problem! You can either study the user manual or contact our highly skilled technical staff for assistance.

Keep your Netgear wifi extender out of corners.

Isolating your range extender within the worst-case network signal scenario. It is logically impossible to connect to the Netgear extender setup process or place your device in a heavily trafficked area. The extender’s magnetic waves may cause the extender’s signals to be weak. For increased property to mywifiext, place your range extender in any open area.

Do not leave your networking tools lying around.

Your wifi-enabled devices emit signals in descending order. Furthermore, once your device is on the ground, the flag admission decreases because signals cannot connect through cement.

Maintain a safe distance between your Netgear wifi extender and electronic devices.

In fact, this is crucial. Simply place your Netgear router and extension as far away from your computers, laptops, and television as possible. These items can sometimes act as a barrier between the wireless connectivity of your router and extender. They also slow data transmission through the Internet interface.

We hope this blog helps you improve the Netgear extender performance. If not, the situation will remain the same. Simply contact us via chat or our toll-free number.

How to block devices from Netgear wifi extender network?

How to block devices from Netgear wifi extender?

How to block devices from Netgear wifi extender?

How to block devices from Netgear wifi extender network?

Not every device connected to your Netgear WiFi is willing to use your bandwidth. If you want to prevent your ungrateful housemates, leeching neighbor, or simply an unidentified device from utilizing your WiFi, you can apply a MAC address filter. This article will teach you how to block devices from your Netgear wifi extender

What is MAC Filtering?

Before we walk you through how to restrict devices from WiFi, let’s first define MAC filtering and how it works.

  • The Media Access Control, or MAC Filter, is used to produce a list of devices that are authorized or forbidden. To begin, you must know the MAC address of the devices you want to allow or prohibit.
  • A MAC address is a 12-character address assigned at random to a device. Regardless of where it is, the device remains the same. The MAC address of a connected device can be retrieved through the web user interface of the Netgear extender, i.e. mywifiext.net
  • While changing the WiFi password is an excellent technique to limit access to an unknown device, it is both cumbersome and ineffective.There’s also no guarantee that no one will guess the new password and gain access to your WiFi network.
  • You must also re-enter the new password for all previously linked devices. Alternatively, blocking a device is more effective and places it on the blacklist for a ‘lifetime’ restriction.

How Do I Block a Device From Netgear Extender’s WiFi Network?

That’s all there is to know about MAC filtering. Now, let’s look at how to prevent someone from using your WiFi.

Operation 1 – Ensure that the Extender is turned on.

First and foremost, ensure that your Netgear WiFi range extender is turned on. You can check the status of the Power LED to ensure that the extender is correctly turned on and receiving steady power supply.

If your Netgear extender is turned off, plug the power adapter into a wall socket and turn it on. However, keep in mind to inspect the wall socket; it should be in good condition.

Operation 2 – Turn on your computer or laptop.

The next step in blocking devices from your Netgear extender’s WiFi network is to turn on a PC or laptop. Then, go to the WiFi manager and connect it to a dependable and fast WiFi network.

Operation 3 – Access Your Netgear Extender

  • Now, launch your preferred web browser and the browser should be upgraded to the most recent version.
  • Enter the default web address of your Netgear range extender i.e mywifiext.net in the address bar and press the Enter key. 
  • Wait for the login page to fully load.
  • When finished, enter the admin user ID and password when prompted and click Log In.

Operation 4 – Disable WiFi on Devices

Do the following as soon as you reach the Netgear genie setup wizard:

  • Navigate to the Settings menu.
  • Select the option Connected Devices.
  • Then, tick the box labeled Enable Access Control.
  • Select the device to which you want to deny access and tick the Deny check box.
  • Once finished, click the Save button to apply the changes.

In this way, you can block devices from Netgear wifi extenders. It is recommended that only known devices join your wireless network. Don’t hesitate to contact our knowledgeable professionals if you run into any problems.

wireless mesh network

How to create a wireless mesh network at home?

How to create a wireless mesh network at home?

Do you have problems with your internet connection? The best way to solve the problem is to create a wireless mesh network with your current router. If you don’t know how to set up a wireless mesh network using an existing router, this guide may be of great assistance. So, before we get started, let’s first get you acquainted with Netgear Mesh WiFi Systems.

wireless mesh network

What are Netgear Mesh WiFi Systems?

Mesh system

Netgear Mesh WiFi Systems are the one-stop solution for enjoying lightning-fast internet across your home. Even after setting the router and performing the Netgear range extender setup, users may experience internet problems in certain regions of their homes. If you have dead zones in your house, creating a wireless mesh network with your existing router can work miracles.

The best mesh wifi will allow you to transform your home’s dead zones into entertaining zones. Mesh systems, which use advanced technology, are essentially offered to improve your Wi-Fi connectivity and elevate your internet-using experience to the next level. To reap all of the benefits, though, you must properly configure your Mesh network wifi at home.

Install WiFi mesh with an Existing Router

Please keep in mind that the instructions outlined below are for generic models. However, the processes may differ depending on whatever Mesh WiFi system you use.

Start by connecting the mesh system

Begin by putting your system’s power cord into a functional power socket to configure your Netgear Mesh WiFi with the existing router. After that, use an Ethernet cable to connect the Mesh system or nodes to your existing router.

Quick Tip: Make sure your Mesh WiFi system’s nodes (particularly the primary node) are in the correct location. Otherwise, you may encounter difficulties when configuring your Mesh network WiFi with your existing router. As a reminder, the primary node of your Mesh system should be located near your existing home WiFi router.

Install the Netgear App

When you have finished connecting your devices, go to the App Store that is compatible with your smartphone’s operating system and download the Netgear app.

Create a Netgear account and log in to your router to continue. After that, the software will walk you through the process of configuring your Mesh system.

Set Up Your wireless Mesh network

The program will now search for your Mesh system’s parent node. You will be notified as soon as the app detects the node. Take note that the node of your WiFi router will be assigned an IP address automatically.

The next step is to give your network a name and a password. Ideally, the same credentials should be assigned to both WiFi bands. Some systems, however, require a distinct password for the 2.4 and 5GHz bands. This is how you configure the nodes in your Mesh system.

Begin Changing Settings

Once you’ve finished configuring the Mesh network wifi with your existing router, you can begin modifying the Mesh’s settings to suit your needs. However, in order to get the most out of your WiFi system, keep the following factors in mind:

  • Never put your Mesh WiFi system’s nodes on the floor. Place them on a tabletop or higher surface instead.
  • Make certain that the Mesh system nodes are close to a working power socket. This eliminates the need for access to an extended cable.
  • Maintain a minimum distance of 30 feet between your nodes.
  • Place the nodes outside of a cupboard or under a table.

Finishing up

That was all about creating a wireless network with an existing router. We expect that the guidelines in this blog will assist you in configuring your Mesh without difficulty. Please keep in mind that if you encounter any problems while carrying out the process, you can contact our technical experts for rapid assistance. 

For more information:

mywifiext.net setup

Netgear extender Default ip address

NETGEAR EX3700 SETUP

Netgear AC750 Setup

Netgear AC750 Setup

Netgear AC750 is the series of wifi range extenders which comes with the simultaneous dual band 2.4Ghz and 5Ghz technology. It can deliver the max speed upto 750Mbps which leads to reduce the interference in your network.It comes with two wifi modes and two antennas for better wifi network coverage. After you perform Netgear AC750 Setup you will be able to use your extender in two different modes.You can use it to extend your existing network and you can also use it to create a new Access point as well. Let’s go with the setup process.

For Netgear AC750 Setup follow the instructions given below:

  1. Power on your Netgear AC750 EX3700 extender.
  2. Place it closer to the home router.
  3. Wait until the power LED on your AC750 turns solid green.
  4. Now you need to grab any mobile device.
  5. Connect your wifi enabled device to the existing network.
  6. Open a web browser and visit www.mywifiext.net.
  7. Go to the New Extender Setup.
  8. Follow the on screen prompts to finish the setup process.
  9. Once it is done,unplug the booster and plug it between the dead zone and your wifi router.
NETGEAR EX3700 SETUP

Table of Contents

That’s how you can setup your Netgear AC750 manually. But a manual method is not only one way to setup your booster, You can also configure it with the WPS Setup. In the next blog we will discuss the WPS method to configure your repeater.

Netgear AC750 setup

Netgear AC750 WPS Setup

Let’s get introduced with another way to setup your Netgear AC750 i.e the Wireless protected setup (WPS) which is considered as the quickest procedure to configure your repeater. Netgear AC750 WPS Setup will not take more than 2-4 minutes to be performed. Let’s see how this setup is supposed to be done.

Here are the steps to do Netgear AC750 WPS Setup:

  1. Power on your Netgear AC750.
  2. Position it near to the existing router.
  3. Wait until the power LED on your AC750 gives solid green light.
  4. Press the WPS button on the booster.
  5. Also press the WPS button on the main router after a minute.
  6. When your booster gives three solid green lights,which means that you have finished the setup process.
  7. Now it’s time to unplug your AC750 and place it at the location having dead spots.

That’s how you can install your Netgear EX3700 setup on login page of mywifiext.net within two minutes only without entering any personal information like passphrase,username and SSID.In the next blog we will talk about the procedure to update the firmware on your extender.

Netgear AC750 firmware update

Have you been facing problems with the performance of your extender or is it behaving badly? If yes then you need to update the latest version of the firmware which is provided by NETGEAR. After you perform the Netgear AC750 firmware operation on your booster you will get the latest features and security updates which helps you to improve the performance of your AC750 and to fix bugs as well.

For Netgear AC750 firmware update go through the steps given below:

  1. Firstly turn on your Netgear AC750 by plugging into a power socket.
  2. Place your repeater and existing router close to each other.
  3. Open any web browser and go to www.mywifiext.net.
  4. Type your username,passphrase and SSID to login.
  5. Hit on settings option and then on firmware upgrade.
  6. During the update process do not unplug your AC750.

By following these steps you will be able to update the latest version of firmware on your Netgear AC750. In the next blog we will talk about the factory reset operation.

Netgear extender firmware update

Netgear AC750 reset

In case you are not able to remember your admin password or your username and you want to recover it then, you will have to go with the Netgear AC750 firmware update process. After you perform a factory reset operation on your extender it will delete all the personalized data including your password,username and SSID also and it will make your extender ready for the new installation process. So Let’s go with the reset operation.

Netgear ac750 setup

Here are the steps to reset Netgear AC750:

  • Turn on your Netgear AC750.
  • Find the reset button on your extender.
  • It is available on the side of the AC750 under a small hole.
  • Grab a sharp pointed needle or a pin.
  • Press the reset button with the help of a pin for 10 seconds.
  • After 10 seconds take it out.
  • In this way you have performed the factory reset operation successfully.

In case you are facing any trouble regarding the setup,update or reset operation you can reach us by sailing our toll free number and also via live chat. Our technical team will help you to resolve your issues.