
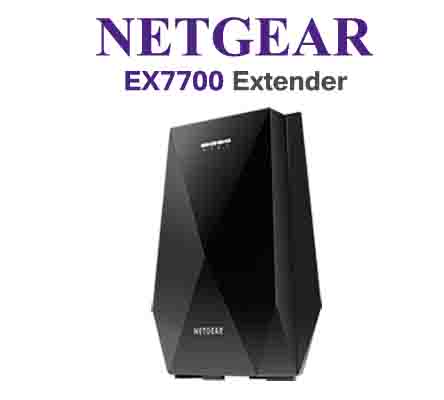
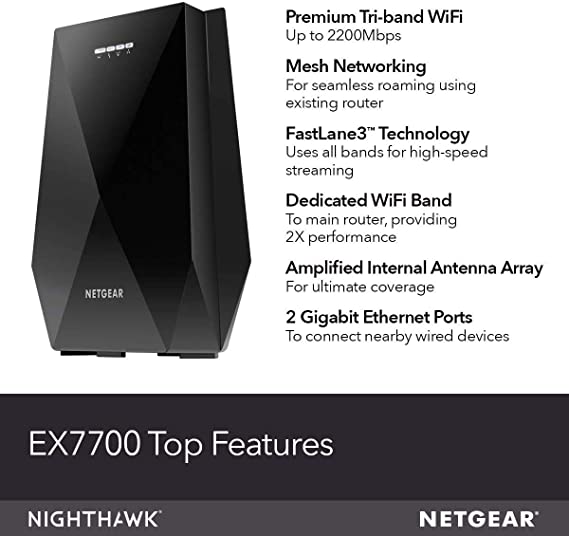
Netgear Nighthawk EX7700
Netgear EX7700 Setup guide: Fighting dead zones in your residence? Getting quick internet access in your living room but no internet connectivity in the backyard anymore? Netgear extenders or Mywifiext allow incoming wireless signals through your existing home network and then enhance them to every corner of your house. Generally, the Netgear Extender acts as a link, taking WiFi from your router and rebroadcasting it around your home.
So, here you’ll read about the different methods for the Netgear EX7700 extender setup for your local area and troubleshooting tips to just get rid of all concerns during installation:
Netgear EX7700 Setup | AC2200
Netgear Nighthawk Extender
Step-by-step instruction for Netgear EX7700 WIFI extender setup:
- To begin the Netgear EX7700 setup, plug your extender into a power outlet.
- When you see the power led light on the EX7700.
- Access any WIFI-enabled device, such as a wireless desktop or laptop computer.
- Now, from the WIFI settings menu, connect your device to Netgear ext.
- Once connected, open a web browser i.e. Mozilla Firefox or Google Chrome.
- Type www.mywifiext.net on the address bar of the web browser.
- Netgear EX7700 mesh extender setup screen appears on your laptop or desktop.
- Follow the steps to link your AC2200 to your existing WIFI network.
How to configure my Netgear EX7700 WIFI range extender?
To setup Netgear EX7700 Nighthawk X6, follow the steps given below:
- Plug the EX7700 extender into an electrical socket.
- To begin the setup, wait until the Power LED on the Netgear AC2200 turns white.
- From a computer or a mobile device, open a web browser and type in “mywifiext.net”
- You are now Netgear EX7700 installation page.
- Follow the on-screen instructions in order to configure the extender.
- Unplug the WIFI booster and place it where you have a weak WIFI connection.
Netgear EX7700 Firmware Update | AC2200
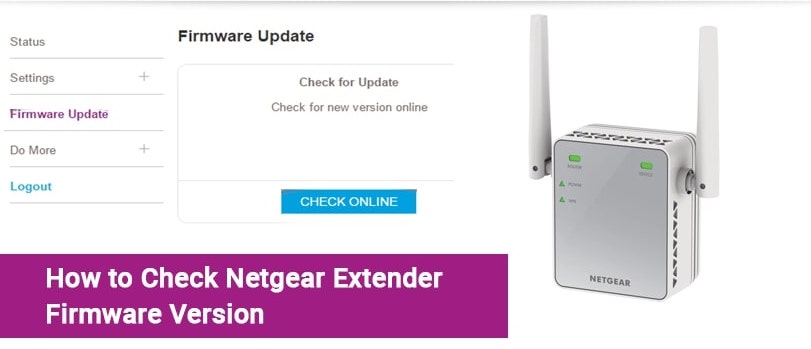
To update your Netgear EX7700 AC2200 range extender’s firmware, follow the steps below:
Switch on your Netgear Nighthawk X6 AC2200 EX7700 first and foremost.
Connect the Nighthawk EX7700 Mesh Extender to your router.
After that, open your preferred web browser.
In the address bar, type mywifiext.net and click Enter.
Type the username and password to log in to your Netgear X6 AC2200.
To upgrade the firmware, go to the Settings menu and choose Firmware Upgrade.
After that, press the check button.
If a new firmware update is available, select yes to upgrade the firmware.
Now wait a while for the Netgear EX7700 firmware to update properly.
That’s the case. The firmware on your Netgear EX7700 Extender has been modified. Feel free to contact our experts if you run into any probl
Netgear AC2200 | Common Issues
- No light lit up on the Netgear EX7700.
- Unable to setup Netgear AC2200 using 192.168.1.250
- Mywifiext.net is not opening up.
- The WIFI extender is connected but has no internet connection.
- Forgotten the login Id username and password to access the genie setup page.
- Unable to log in to Netgear EX7700 Setup page.
- Can’t install the Netgear AC2200 firmware.
For more information and troubleshooting:
Netgear AC2200 Nighthawk X6 Fastlane Setup
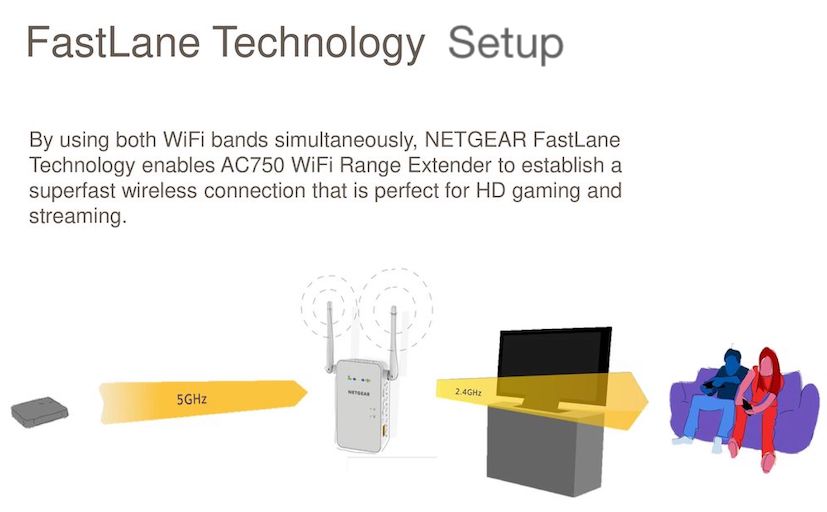
Here’s how a user can setup Netgear Mesh X6 AC200 with FastLane Technology:
- Connect the Netgear AC2200 Nighthawk extender to your WIFI device.
- Open any web browser, such as Microsoft Edge, Google Chrome, or Internet Explorer, as an alternative.
- In the address bar, type www.mywifiext.net.
- Enter the username and password for Netgear EX7700 Login page.
- Wait until the Netgear EX7700 Nighthawk Setup page appears.
- Click on ‘Do More’ option, then on the ‘FastLane’ option.
- Configure your Netgear Nighthawk AC2200 with Fastlane and press the save button.
If you get stuck while enabling FastLane Technology on your extender, don’t hesitate to contact our experts for help.
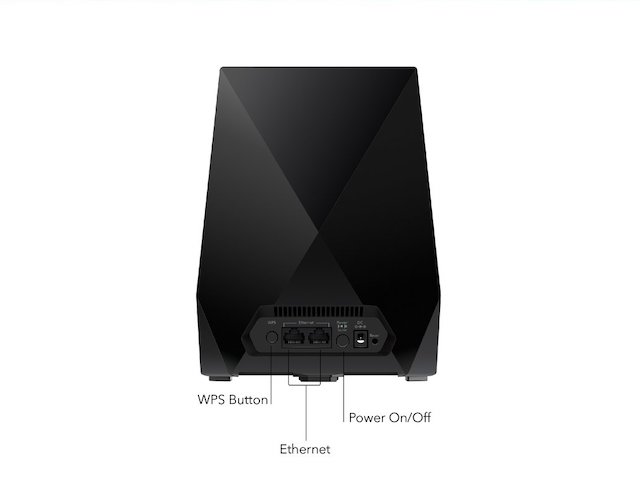
How to install Netgear EX7700 Mesh Extender with WPS?
- To setup Netgear EX7700 Nighthawk X6 AC2200, firstly plug it to an electrical outlet.
- For EX7700 Mesh WPS Setup, the router or modem should also have the WPS button.
- The extender should be near to the main router.
- Wait for the AC2200 Nighthawk power LED to turn green.
- Now press the WPS button on the Netgear X6 wireless booster.
- And then push the WPS button on the main router.
- If there will be blinking lights on both devices. It means the devices are connecting with each other.
- Do not turn off or unplug any device while AC2200 Mesh setup.
- Once the WPS led stop blinking on both devices.
- Look on the Nighthawk, if you have all solid lights on the extender. Your Netgear EX7700 Range Extender Setup using the WPS button is completed.
- Place the extender to the desired location and enjoy great connectivity.
if you are facing any problem installing the wireless booster, get in touch with our certified expert who can guide you to Netgear AC2200 Extender Setup
Recent Posts
- Step-by-step guide for Netgear Orbi AX6000 setup
- A Complete Guide to Fix Netgear POE Switch Problems
- Netgear Extender Access Point Setup
- Netgear Nighthawk AXE11000 Router Setup
- How to activate access control on a Netgear wifi extender?
- Troubleshooting Tips for Netgear Authentication Error
- Quick Troubleshooting Techniques for Mywifiext Not Loading Error
- Netgear Nighthawk XR1000 Router
- Netgear EX7500 Setup
- How to fix Netgear extender firmware update failure issue?
- Netgear AC1900 Extender Setup
- Netgear WN3500RP Setup
- What is www.mywifiext.net
- How to enable Netgear smart connect on Netgear wifi extender?
- A Step-by-Step Guide to Resetting a Netgear Extender