Netgear extender setup

What are the installation steps for Netgear EAX80?

Netgear EAX80 Setup

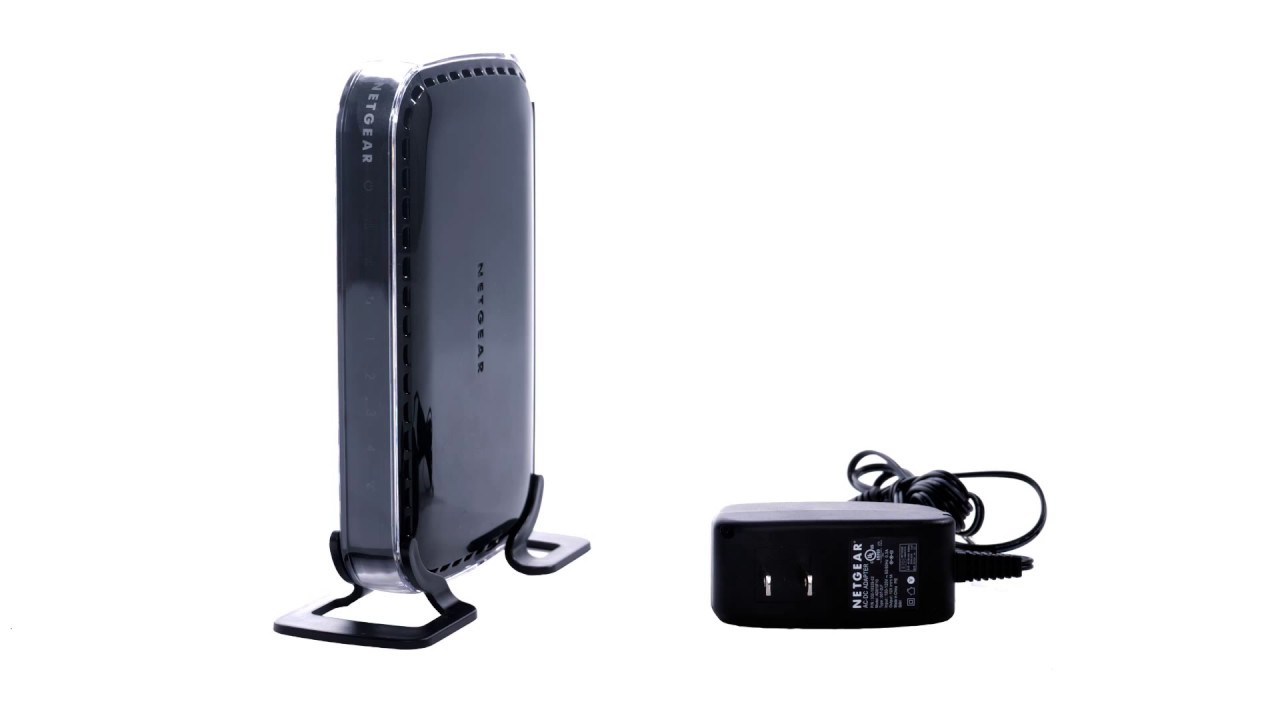
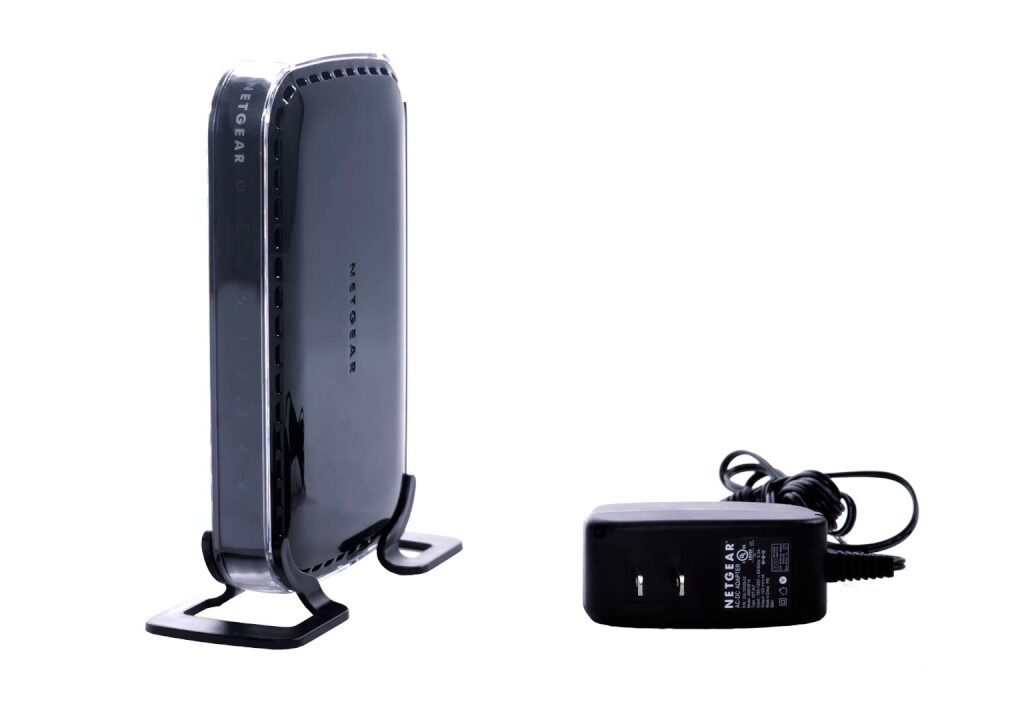
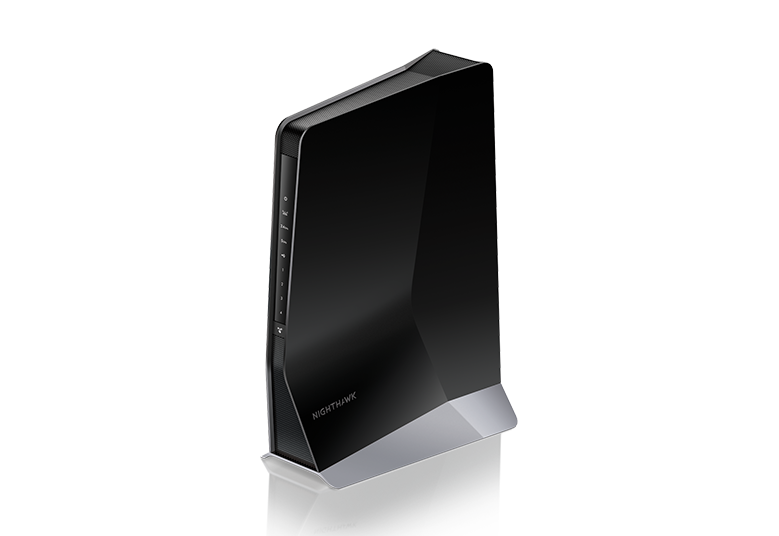
Netgear EAX80 Setup | This high-capacity, high-speed Nighthawk AX6000 Mesh Repeater is designed for the coming years of Wi-Fi, giving maximum capacity, speed, and coverage. With blazing fast connections up to 6Gbps, you can have a better connected home experience and extend faster Wi-Fi to the farthest part of your home

netgear eax80 setup
Netgear EAX80

How to configure my Netgear EAX80 WIFI extender AX6000?

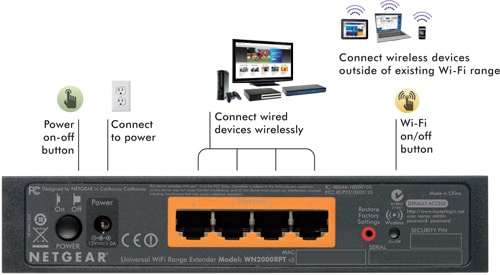
  • To setup Netgear EAX80, start by plugging the repeater into an electric outlet.
  • Once you see the power led light on the EAX80 extender.
  • Use any laptop or a tablet and go to the wireless option on your device.
  • There you have to connect with the “Netgear_Ext” network.
  • After connecting to the extension WIFI. Open any web browser.
  • And type www.mywifiext.net on the address bar.
  • You are now on the Nighthawk new extender setup page.
  • To connect your booster to your wireless router or modem, follow the on-screen prompts.

Attach your PC or smartphone to the new Netgear eax80 ax6000 extender.

Netgear Nighthawk AX6000 Guide

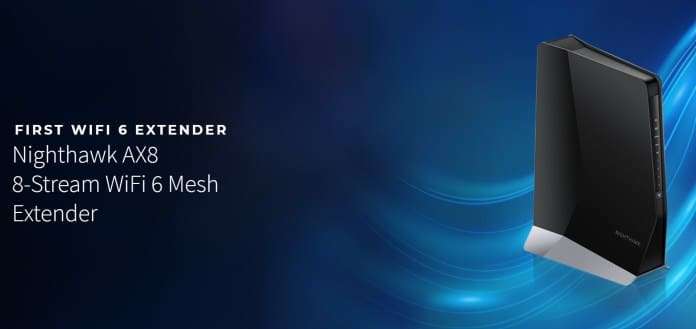
The Netgear Nighthawk AX8 8-stream AX6000 EAX80 WIFI 6 mesh extender offers up to 6Gbps WIFI speeds. You can enjoy quick online gaming, seamless HD streaming, and buffer-free music streaming in your home or office. 

If you don’t know how to setup Netgear EAX80 Nighthawk AX8 AX6000 WiFi 6 extender, you’ve come to the right place. Here you can learn how to set up your Netgear AX8 WiFi 6 mesh extender in its entirety. 

Netgear AX6000 Mesh Extender Setup | EAX80

Here we are talking about what to do next when you are on the Netgear EAX80 setup page to connect the extender to your wireless router or modem. 

Manual step by step instruction to how to create an account and setup AX6000 Mesh to the home wifi network.

  • When you are on the www.mywifiext.net page. Click on the EAX80 new extender setup button.
  • You will now see a create an account page. Fill all the required fields.
  • And click on “Continue“. It will now ask how would you will like to setup Netgear AX600 WIFI mesh extender.
    • WIFI RANGE EXTENDER
    • Access Point
  • Choose any one of the option and click on “NEXT
  • Now your EAX80 WIFI MESH AX6000 searching for the available wireless connection.
  • You will now see your home wireless network name on the list.
  • Choose your home WIFI name by clicking on the radio button and tap on “NEXT
  • Enter your home network password and hit on “Continue
  • Now please wait for 2-3 minutes while your repeater and router will communicate with each other.
    • Note: Do not unplug or turn off the booster while setting process is going on.
  • Your Nighthawk is successfully connected to your home system.
Netgear wn2000rpt

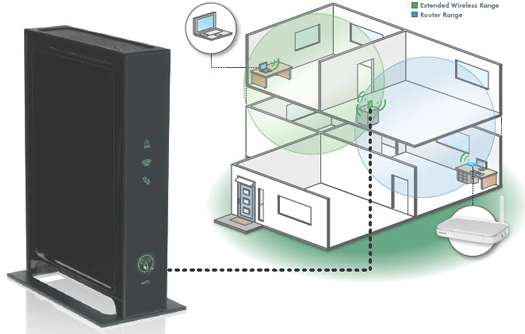
That’s how to get your Netgear Nighthawk AX6000 AX8 EAX80 WiFi range extender up and running. You will now unplug the extender and transfer it across your house or workplace. Link all of your WiFi-enabled computers to the latest, expanded WiFi network to get high-speed internet.

Netgear EAX80 Setup | WPS Method

Netgear Nighthawk AX8

Have you found the above-mentioned Netgear EAX80 configuration process to be difficult?

Don’t be concerned! For Netgear extender Setup, use the WPS system. The below are the measures to use the WPS push button to mount your Netgear Nighthawk AX8 8-stream AX6000 EAX80 WiFi 6 extender:

Netgear EAX80 Mesh Extender setup via Nighthawk App

  • Firstly install the Nighthawk application on the smartphone.
  • A user can download the application from Apple app store or from Google play store.
  • Create an account for setup Netgear EAX80 extender.
  • Now to connect the repeater to your existing router or modem.
  • Obey all the prompt step by step on your your app.
  • Once you successfully installed your booster.
  • You will see all led light lit up solid white.
  • Unplug the repeater and move it to the desired location.
Mywifiext.Local

Netgear EAX80 AX6000 | Firmware Update

  • Open up any web browser from laptop or smartphone that is attached with the Netgear EAX80 extender network.
  • Now, you have to login in either of these:
    • Windows Operating system use mywifiext/ or mywifiext.local/
    • For Apple or Linux or IOS system use mywifiext.local/
    • Android system use your Netgear’s IP address
  • Type in admin ID and password and tap on LOG IN option displayed.
  • Whether the browser shows the Menu option, tap on it.
  • Choose the Firmware Update option.
  • Tap on the “Check Online” option.
  • Whether any new update is available, follow all the steps to upgrade your Netgear AX6000 extender firmware.

How to log in to Netgear EAX80 settings page?

  • Open up interent browser from any laptop or smartphone that is attached with your Netgear eax80 ax6000 network.
  • Enter in mywifiext.net in the website field of internet browser.
  • Tap on the Enter option.
  • Type in admin ID and password when prompted to.
  • Tap on the LOG IN option.
  • Whether internet browser shows the Menu button, now tap on it.
  • Choose the Settings option to open it and change the Netgear extender configuration.

Netgear EAX80 AX6000 trouble shooting steps

  • When you attach your laptop or smartphone to the Netgear ax6000 eax80, always check that Netgear extender’s Client Link light turns white.
  • Whether you don’t remember your ID or password, tap on the “Username & Password Help” option.
  • Whether interent browser shows an error page, put in “http:// “in the website bar of internet browser by putting in this “http://www.mywifiext.net”.
  • Whether your Netgear ax6000 is configured but coudn’t attach with the main Wi-Fi network, make sure that whether the Client Link light is off.
  • Whether you can’t have WiFi connection stable, take any Ethernet cable to attach to your PC to Netgear ax6000 eax80 extender.

If you still face any trouble regarding your Netgear Nighthawk Setup login page , you can still login via default login IP address i.e 192.168.1.250.

Mywifiext extender setup

Mywifiext Extender Setup

Mywifiext Extender Setup 

Are you looking to set up a Netgear extender at your home? If yes then your search ends here. This page will drive you through the steps that you must follow in order to set up your Netgear Extender at home. Let’s just begin.

  1. Firstly, you have to arrange some perquisites before starting with the setup process. Let’s have a look at the requirements: 
  2. The first requirement is that the router and the Mywifiext extender are needed to be in the same room.
  3. The second requirement is that a proper supply of power should be given to the extender.
  4. The third prerequisite is that you need a working internet connection or a Wi-Fi network.
  5. The last requirement that we need is two internet browsers installed on your computer.

With all these requirements, the Mywifiext extender setup will be a cakewalk for you. Let us now have a glance at the other steps that are required for the setup.

Mywifiext extender setup using www.mywifiext.net

There are mainly two methods to get our Netgear Wi-Fi extender installed. They are manual and WPS methods. Let’s take a glance at both of them respectively: 

Mywifiext extender setup: Manual method 

This method of setup is also popular by name of the “web browser setup” method. Do every step one by one as stated below:

Mywifiext extender setup

  • Turn the extender on by providing it with a proper supply of power.
  • Make sure that your Wi-Fi device and extended are connected with each other. 
  • Turn on your Network manager and look out for NETGEAR_EXT. Once found, connect to it. 
  • Open any of the installed browsers on your computer 
  • Open the default page of your mywifiext extender setup page and if you encounter any problems while accessing, contact customer service.
  • You need to make a new account if you have not created it before. 
  • Now when you’ve done the above steps, now click on the SSID of the network that you need to get extended. 
  • Hit the button that reads “Next” followed by the “Finish” button. 

And that’s where the setup ends. This is the point when you may place the extender wherever you like, regardless of the place.

Mywifiext Extender Setup: WPS Method 

It is one of the easiest variants of methods to set up the extender. It is also known as the Wi-Fi-protected setup. Follow these set of instructions to do it: 

  • The first step is to confirm that the extender is in “On” mode.
  • Locate a button namely the “WPS button” and once it is found, press it for about 5 seconds. 
  • Do the same for the old router as well I.e. locating and pressing the WPS button. Mywifiext extender setup
  • A green color in the LED indicator concludes that the connection has been established between an extender and the router. 
  • If there is no sign of the LED light then you may consider help from an expert. 
  • The same set of Instructables can be employed for dual-band range extenders as well. 
  • Lastly, you need to connect the device to the network of the extender, and to do that, you have to use the same password as your router. 
  • You may check the manual you got for the default credentials of your router.

With this step, you have successfully completed the setup of your extender. You may enjoy fast internet services over a longer range in your house now. 

In case, there are some problems with the mywifiext extender setup, contact customer service as soon as possible.

Mywifiext extender  setup: Without Ethernet Cable 

Every extender has a different build and that’s the reason that not every extender has an Ethernet port. And just because of this one reason, people encounter various problems while setting up their extender. 

Here is a step-by-step guide that will walk you through the necessary things that you must follow to set up your extender without the need of an Ethernet port: 

  1. First and foremost, get your extender to reset to the default settings that it came with. 
  2. Secondly, you need to connect your extender to stable Wi-Fi.
  3. Thirdly, log into your account using a web browser that is installed in your system. 
  4. Once these three steps are done, you will require to enter the username of the extender and the default password. 
  5. To get any assistance regarding the login, contact customer service.
  6. Later on, you need to follow the necessary steps that are shown in the Netgear installation wizard to get it connected with the router. 
  7. And at last, simply connect your devices to the extender.

If there are still some problems that persist in the setup of your extender, contact the highly professional.

What is NETGEAR_EXT?

If you are wondering what is NETGEAR_EXT, then you must know that it is an extension that is mandatory to get access to the Netgear Wi-Fi extender. The moment you have completed the setup procedure using the mywifiext.net website, your devices such as your laptop, mobile, and PC can access the Wi-Fi connection through this extension only. 

To do this, just turn on the power supply for the extender and look for the network SSID named “NETGEAR_EXT” and connect to it. Just so you know, it is the default SSID of the network. 

Common problems that may encounter while setting up the extender 

  • No access to the local domain of www.mywifiext.net
  • The proper signal strength of Wi-Fi is not being provided
  • Not being able to make a connection to the NETGEAR_EXT network
  • No sign of any LED light before and after the Netgear extender setup.
  • Not being able to log in to the settings portal of the setup
  • Forgotten the admin password of the extender

Experts for the assistance of your new Netgear extender are here to aid you 

Netgear is a renowned brand of extenders. They have a specialized team of experts that are always up to help you regarding all your concerns about the Mywifiext Extender setup

If you ever face any issue while setting up your extender, you just need to make a call to their toll-free number and they will provide you the assistance you need. 

Customer satisfaction is the primary motive of Netgear and that’s what makes it better than the others. Therefore, in the upcoming future, if you ever need any network-related gadget, try Netgear and the results won’t be regrettable.

Netgear extender setup

Installation Steps for Netgear Nighthawk X4

A wi-fi mesh extender, the Netgear Nighthawk X4. Both areas of your room are secured by the Nighthawk mesh wifi extender. With the Netgear extender setup, you can easily connect all your devices. For all connected devices, you can use one name and the same password. It comes with a smart roaming feature that connects your devices to the best wifi network automatically. These steps can be used for setting up your extender;

Netgear Nighthawk X4

  • Your Netgear extender setup needs to be turned on first.
  • You can now place your extender near the router.
  • Your Netgear Nighthawk X4 extender can be wired to the power supply.
  • Now the green color of the LED lights will start blinking.
  • Then you need to keep the power button if the LED light does not blink.
  • Using your Nighthawk router, attach your Netgear Nighthawk extender.
  • You can now open a web browser for Chrome. Specify the details.
  • In the new position, you can locate your new extender setup.

Netgear Nighthawk X4 extender setup via WPS method:

  • The power of your Netgear Nighthawk X4 extender can be used by the user.
  • The extender and the router can be mounted in the same position.
  • You can now use a power supply to attach your extender.
  • Then, the green LED light blinks.
  • On your extender, the user needs to find the WPS button
  • You can now click the WPS button for a few seconds, and you can also click your router’s WPS button.
  • The consumer will quickly note that the LED light’s white color means that there is a strong link between your router and your Mywifiext.
  • You can now place your extender at any position where you can get the best network quickly.

Netgear Extender Setup Fast Lane Technology:Netgear extender setup

  • With the aid of Fastlane technology, the user can experience the best wifi performance. It provides fast wifi technology with speed.
  • With the Netgear Nighthawk X4 extender, you can easily access the fast lane technology.
  • First, with your extender, you need to attach your router.
  • You may open a web browser.
  • Enter the mywifiext.net file here.
  • The username and password need to be entered now.
  • The user can open the page of their Netgear genie app and tap on ‘Do More’ and then on the Fastlane choice tab.
  • The first two options here are 2.4Ghz for ‘Device to Extender’ and 5Ghz for Extender to the Router, and the second option is 5Ghz for ‘Device to Extender and 2.4 for Extender to the Router.
  • You can pick and save any choice.
Netgear WN2500RP setup

Netgear WN2500RP Setup

Netgear WN2500RP Setup:

Manual Step-By-Step Guide:

Netgear WN2500RP setup

Netgear WN2500rp setup Instruction to connect your brand new extender setup to the existing wireless network.
N300 Wi-Fi range extender – Getting started
The WN2500rp extender expands the range of your main router or modem provides ample wireless connection to your every device.

Plugging and powering on the Wn2500rp

  1. Place the Netgear N300 near to the main router like 2 -3 away for the initial setup.
  2. Plug the Netgear N300 into the power outlet and wait for the power led light to turn solid green.

How to connect the Netgear WN2500RP to the home wifi network.

Netgear Wn2500 setup | W.P.S option

  • N300 w.p.s setup is one of the simplest ways to connect the range extender to your secure wireless connection.
  • Push the w.p.s button on your router and within 1-2 minutes push the w.ps button on Wn2500rp.
  • After syncing up to the main router. The extender will have 3 solid led green lights
  • Connect your extender to the wireless-enabled devices.

Note – If your router didn’t have a w.p.s button follow the second option to connect your N300 to the home network.

Netgear WN2500rp Setup | N300 Extender Setup 

  • After powering on the Netgear N300. Locate for the Netgear_ext network on any wireless-enabled device and connect with it.
  • Once you connect to your Wn2500rp extender open any web browser on your respective device i.e Google Chrome, Mozilla Firefox, Safari, etc.
  • Type www.mywifiext.net or www.mywifiext.com on the top of your web browser and click on search.
  • Now you will see a New extender setup tab on your screen.
  • Create your account and follow the instruction to connect your Netgear Wn25000rp to your home or office wireless system.

How to login to Netgear N300 login page?

After connecting your N300 Extender if you want to make any changes on your extender, or want to run the setup process again, you can log in to the extender page by typing www.mywifiext.net or www.mywifiext.com on your device browser. The login page asks you to enter the username and password. The default login credential is given below:
USERNAME: admin
PASSWORD: password

If you create your own login information and somehow you forget the credentials. No need to worry, click on the forget password option and enter the security questions to retrieve the login info.

Netgear WN2500RP Setup Guide: Manual

WPS Setup on Auto pilot

You may attach the extender to your router using WPS (Wi-Fi Protected Setup), which eliminates the need to manually input the network password.

Netgear WN2500RP setup

Netgear WN2500RP Setup Steps | WPS

Netgear WN2500RP Setup | Manual Method

If your router doesn’t allow WPS, you can always use your web browser to set up the extender manually.

Netgear WN2000RPT
Netgear AC1750 extender setup

Netgear AC1750 Installation Guide using Netgear New Extender Setup

Netgear AC1750 WiFi Mesh Extender

Mesh WIFi System For Better Coverage

Netgear AC1750 extender is observed as par excellence when we chat about extenders. This extender provides you boosted signals to the dead areas of your home or office. This Netgear Extender setup gives you the best Wi-Fi range and performance by which you can stream full HD videos, songs, high-quality graphics games, and a lot more. Netgear AC1750 mesh extender comes dual-band of up to 1750 Mbps and Fastlane technology for HD streaming. It also provides extended Wi-Fi coverage of 1500sq.ft and can connect to 25 wireless or wired devices. This extender also has seamless smart roaming with which it uses the existing network SSID so that it never gets disconnected when you move around your home or office.

The new extender setup also offers you a speed of 50Mbps and has Universal Router compatibility. So, let’s induce the process of installation.

Guide to install Netgear AC1750 extender:-

  • First of all, turn on your Netgear AC1750 extender and place your extender closer to your main Wi-Fi router.
  • Then, plugin your extender into the working power outlet and make sure that it gets a full power supply. Netgear AC1750
  • And then, wait until the Power LED light of your extender turns green.
  • Connect your Netgear AC1750 extender with your main Wi-fi router. Then open the desired web browser on any of your devices and add mywifiext.net in the URL bar.
  • Moreover, they will ask you for login credentials and add username and password and follow the instructions mentioned on-screen, and move forward.
  • Then, connect your Netgear extender set up with your main Wi-Fi router. And move your extender to the new place or location.
  • If you face no connection or poor connection place your Netgear extender close to the router unless the status of the LED light turns White.
  • After finding the desired area with poor signals of the router, connect the other user’s devices with the existing wi-fi network.

If still, you are unable to install the Netgear WiFi Mesh Extender with mywifiext setup reach out to our highly qualified experts they will solve your queries within a matter of minutes.

extender.linksys.com

How to do Linksys wifi extender setup?

Linksys wifi extender setup: Have you ever wondered about how and why, after some time, wifi signals disappear irregularly and come back? There are some locations where there is a constant absence of wifi networks, such as rooms or offices. Wi-fi signals are unable to meet your devices properly for a few purposes. There are a lot of individuals fighting against the routers’ weak internet connectivity. So, using extender.linksys.com to configure Linksys extenders is the best way to handle this problem. When we address extenders, Linksys is a well-known name. The setup guide for the Linksys extender will help you expand the wi-fi coverage in your home or office dead zones. So, we’re going to gain more information about the Linksys extender setup now. In addition to this, we will also assist you with step-to-step instructions for installing the extender.linksys.setup. So let’s begin the setup tutorial on extender.linksys.com.

Linksys Wifi Extender Setup installation procedure:

 
  • The router must have an internet connection that is active.
  • The Linksys extender should be long enough to connect the Ethernet cable to any router.
  • Make sure that the Linksys range extender provides sufficient power.
  • Unless the signal shifts its color to an amber color, hold on.
  • Using the ethernet cable now to connect via the router LAN port to your extender.
  • After that, your network is connected to the installation of the Linksys wifi extender setup.
  • Enter the IP address 192.168.1.1 or the web address http:/extender.linksys.com in the address bar to complete the new extender setup.
  • When Linksys wifi Extender Setup asks, choose the As Wired Range Extender option now.
  • Follow the below instructions for the access point displayed and create the name and password of the network.
  • Afterward, connect the network of the extender to your devices that you just created.