How can I change the Netgear wifi extender default password?
A detailed guide to how to change your Netgear WIFI extender default password. Do you realize how necessary it is for you to change your default password? You might be wondering how to update the Netgear extender password. Don’t worry, changing your extender password is simpler than you think. To update the password on your Netgear wifi extender, simply follow these simple steps on any computer, including Windows, Mac OS, and even Android.
Note: If you already changed the Netgear WIFI extender default password or forgot the password you set up, you can factory reset your range extender using this simple approach.
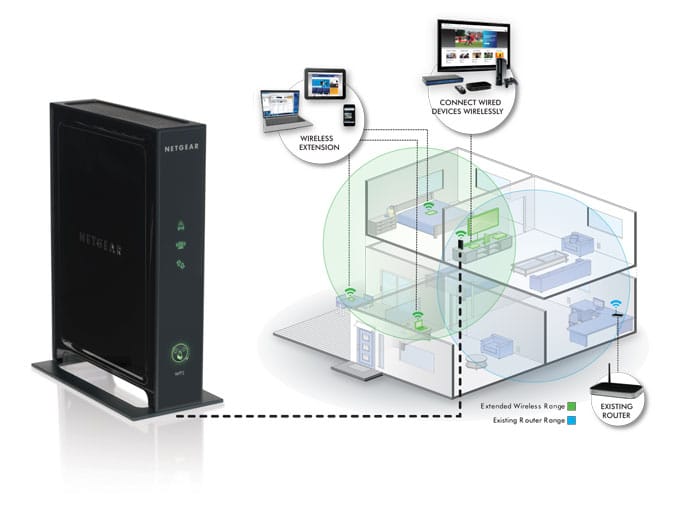
- To update your default password, make sure the device you’re using is connected to your extender network.
- Start your laptop or other device’s web browser. Make sure you have two browsers open in case of a problem, or restart your browser.
- You must first visit the mywifiext setup website.
- If you are using a Windows device, please visit mywifiext.net or contact Netgear support. If you have a Mac or an Apple device, go to mywifiext.local to change the default Netgear password, and if you have an Android smartphone, go to Netgear extender default IP address 192.168.1.250 in your web browser.
- Log in using the admin username and password as the username and password as the password, and then click Login.
- Navigate to the admin panel option and then click on the maintenance option once you’ve signed into the Netgear genie smart setup process.
- You must now choose an option with a new password from the list of available options.
- In order to finally update your existing login and password, a dialog window will appear in front of you, inviting you to enter your old password. Enter your new SSID and password, then press the Apply button to save your changes.
That’s how you successfully changed the Netgear WIFI extender default password on your Netgear extender. However, if you face any issues or difficulties, please contact your Netgear experts by contacting our toll-free number.
Common issues that you could face when changing the Netgear WIFI extender default password
Not all users are successful in changing their Netgear WIFI extender default password on the first try. They run across some difficulties. The following are some of the most common issues encountered by the vast majority of our users.
- Netgear Genie Smart Wizard cannot be accessed.
- The error message 192.168.1.250 is not accessible after providing login credentials.
- Mywifiext‘s website is down.
If you encounter any of these difficulties, don’t panic; simply contact our specialists by phoning our toll-free helpline.
Troubleshooting Techniques for Common Issues When Changing the Default Password
Here are some troubleshooting techniques and suggestions to help you troubleshoot these commonly encountered problems:
- Check that the Extender you’re using is connected to the internet.
- Always keep many browsers open and experiment with different browsers.
- Resetting your web browser may be beneficial.
- Turn off your VPN and try using a static IP address instead.
- Use an Ethernet Cable to Connect
I hope the issue you were having has been resolved. If you are still experiencing difficulties, please call us at our toll-free number.
Continue to read for more information about: