
Netgear EAX20 Extender Setup Guide
Let's have a look at the Netgear EAX20 AX1800 wifi mesh extender which provides you upto 1500 sqft. Of coverage area and it can deliver the max speed of 1.8gbps. After completing the Netgear EAX20 setup you will be able to connect upto 20 wifi enabled smart devices. EAX20 is designed for all WiFi 6 routers and works with any WiFi-enabled wireless router, gateway, or cable modem. Compatible with both existing WiFi devices and new WiFi devices, such as the iPhone 12.

How to setup Netgear EAX20 by WPS?
Wireless protected setup is the easiest way to setup your Netgear EAX20 without proceeding with putting your personalized information like your username,password,SSID e.t.c.In this blog we will tell you how you can do Netgear EAX20 setup by WPS method.

To proceed with the Netgear EAX20 WPS setup follow these steps:
- Take out your Netgear EAX20 from the box and turn it on.
- Place your AX1800 near the router.
- Locate the WPS button on your EAX20 and press it.
- Also press the WPS button on your router as well.
- When the light status on your router and booster will solid white.
- Which means that you have successfully done the setup.
- Now you can place your AX1800 to a new location.
- Connect your devices like desktop,laptop and smartphones to the extended network.
Netgear Nighthawk EAX20 fastlane Setup
If you want to enjoy the maximum wifi performance of your extender then you will have to perform the Netgear Nighthawk EAX20 fastlane setup.It essentially provides a high-speed WiFi connection with a dedicated band linking your WiFi router to your extender and a second band connecting your WiFi device to the extender.
For Netgear AX1800 EAX20 FastLane Setup go through these steps:
- Turn on your AX1800 Dual-band Mesh Extender.
- Grab any wifi enabled smart device.
- Connect it with your EAX20.
- Go to www.mywifiext.local.
- Now Netgear EAX20 login page will appear.
- Follow the prompts to go with the process.
- Now the fastlane option on your EAX20 Mesh WIFI has been enabled.

Connect your Netgear EAX20 using Nighthawk app
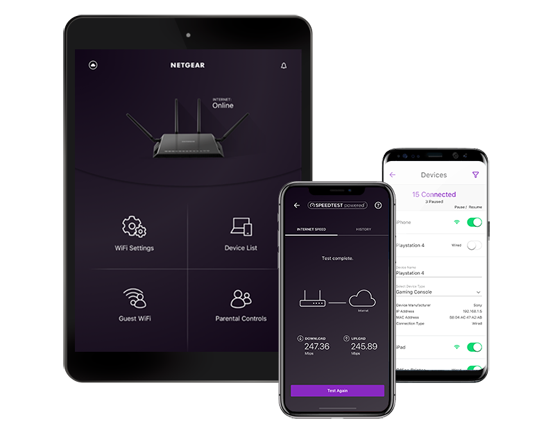
You can set up your AX1800 Nighthawk extender with the help of an application.In this process you will require a phone or a tablet.EAX20 Nighthawk App lets you easily monitor and control your home router from anywhere around the globe.
To setup your netgear Nighthawk EAX20 using app:
- Download the EAX20 Nighthawk app.
- Using any of your mobile devices.
- On your device,navigate to the wireless option.
- Connect to the Netgear_EXT.
- Launch the AX1800 Nighthawk app now.
- Follow the on screen prompts to complete EAX20 Setup.
- Now you are ready to move your extender and use it.
How to update Firmware on my Netgear EAX20 AX1800?
Before going with the firmware update on your Netgear EAX20 AX1800 firstly you will have to know about the firmware and firmware update. Firmware is basically the set of programs embedded into a hardware,or we can say that it is a combination of both hardware and software which comes with the new security updates and other updates which are helpful for fixing the bugs and also improves the performance of the device.
Here's the steps for firmware update on your Netgear EAX20 AX1800:
- Firstly,power on your Netgear EAX20 AX1800.
- Get on a smart device.
- Go to www.mywifiext.net.
- On the Netgear login page enter username and password.
- Click on settings and hit the firmware update option.
- Follow the prompts to go ahead.
- During the update option do not unplug your AX1800.
- Now you have successfully updated the firmware on your extender.
How to reset my Netgear Nighthawk EAX20 AX1800?

After performing the reset operation on your Netgear Nighthawk EAX20 setup, it will prepare your extender for the new installation process. Factory reset operation deletes all your information regarding your username,password and SSID e.t.c.This operation is mostly performed whenever the user forgets his admin password.
To reset your Netgear Nighthawk EAX20 AX1800 go through given steps:
- Plugin your EAX20 and turn it on.
- Behind a small hole you can see the reset button at the side of the AX1800.
- Take a straightened paper clip or something like that.
- Put it in the hole.
- Press the paper clip or anything you have and hold it for 8-10 seconds.
- Wait for the LEDs to become stable.
- Now you have reset your AX1800 successfully.
If you are still facing some issue regarding this process you can contact our technical team by calling us on our toll free numbers or via live chat.